MS Power BI
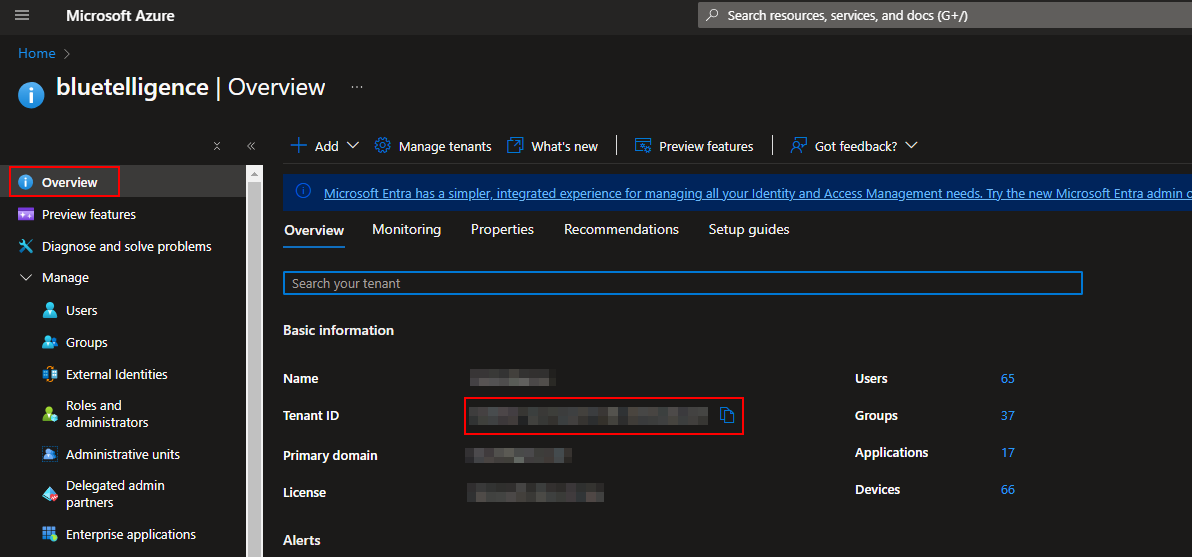
Tenant ID
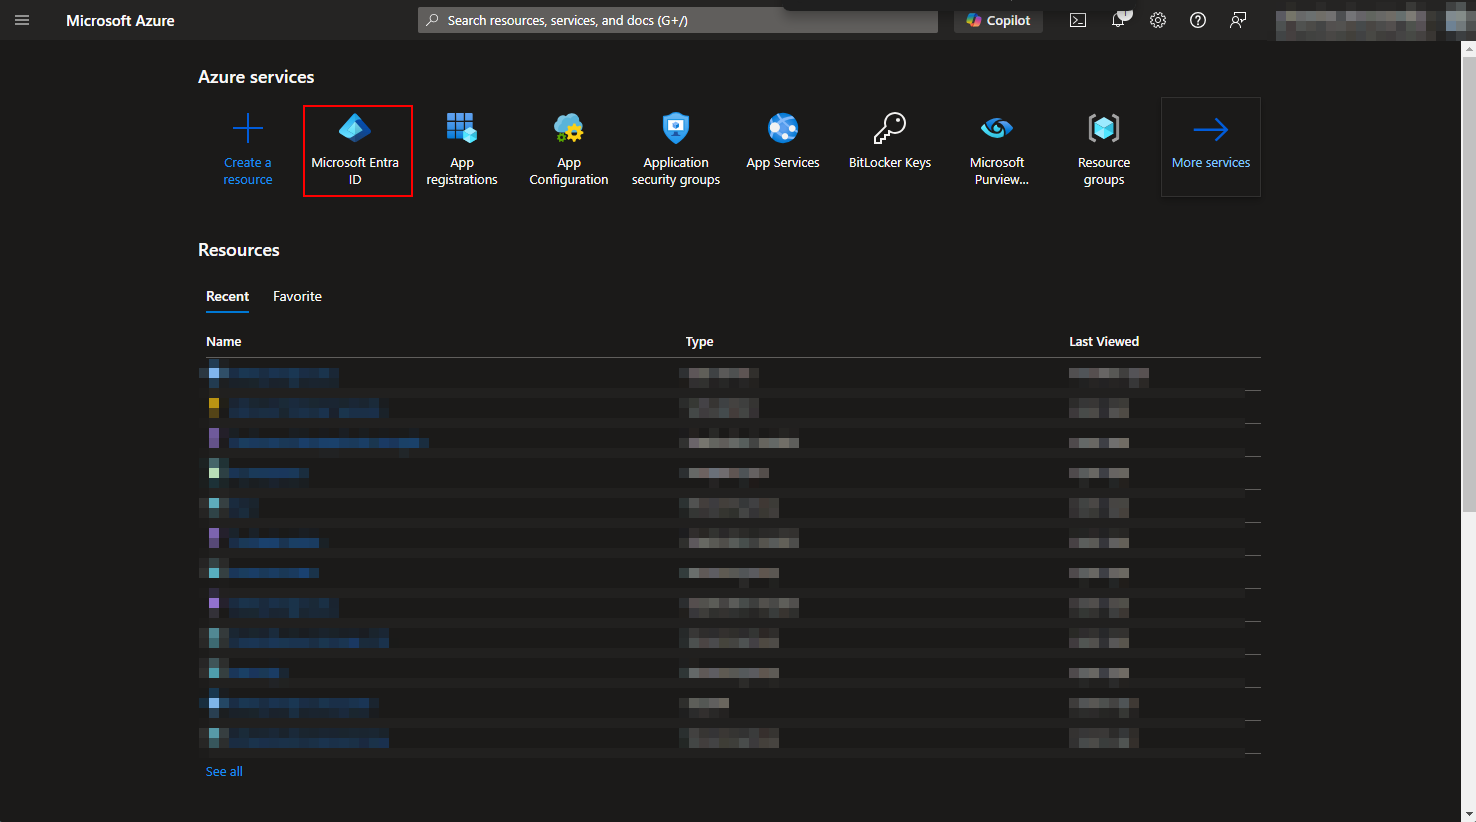
Go to Microsoft Azure and choose Microsoft Entra ID > Overview
Step by step guide
Azure Portal
App registration
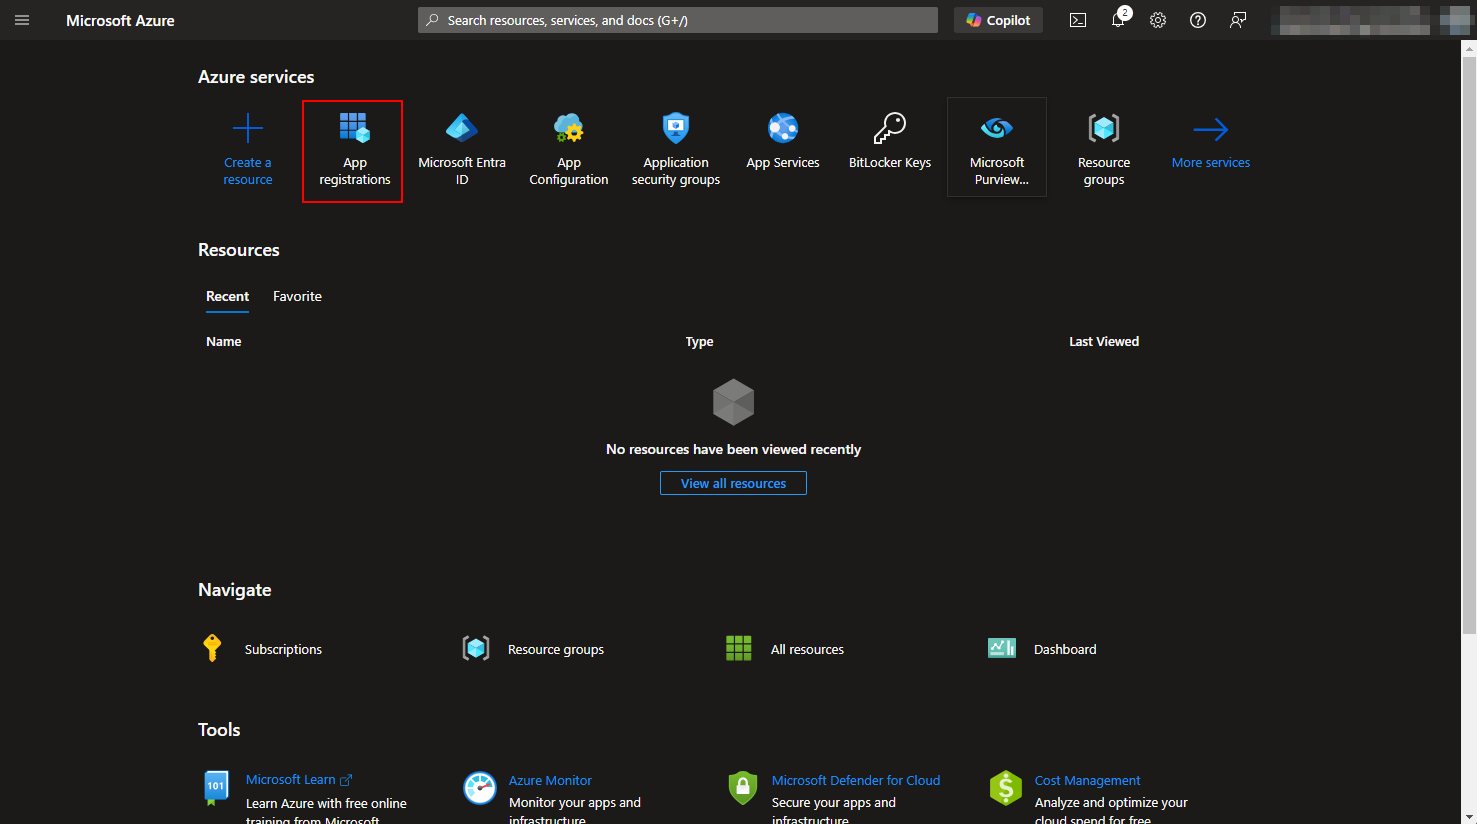
Access App registration in Azure Portal
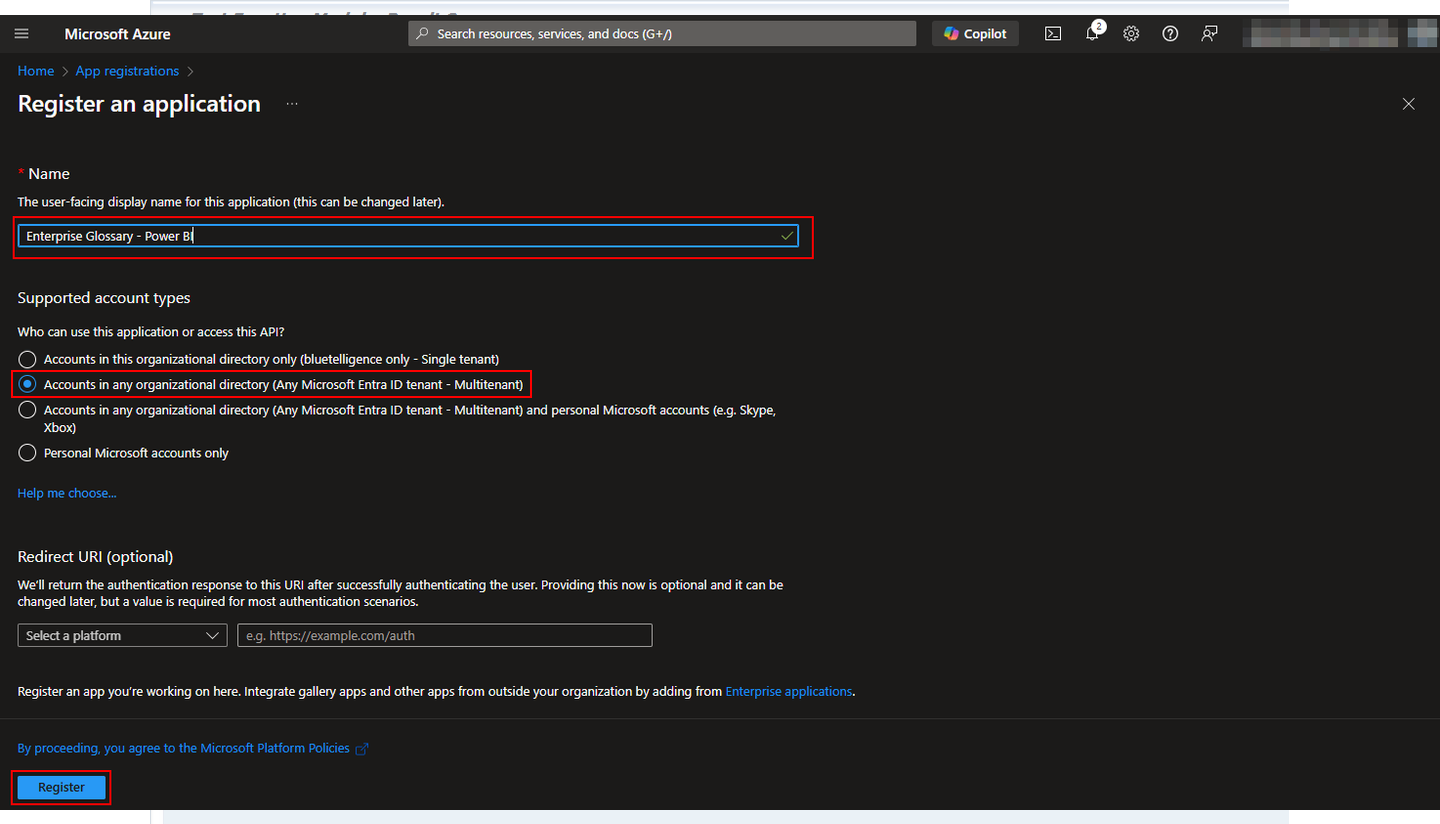
Create a new registration
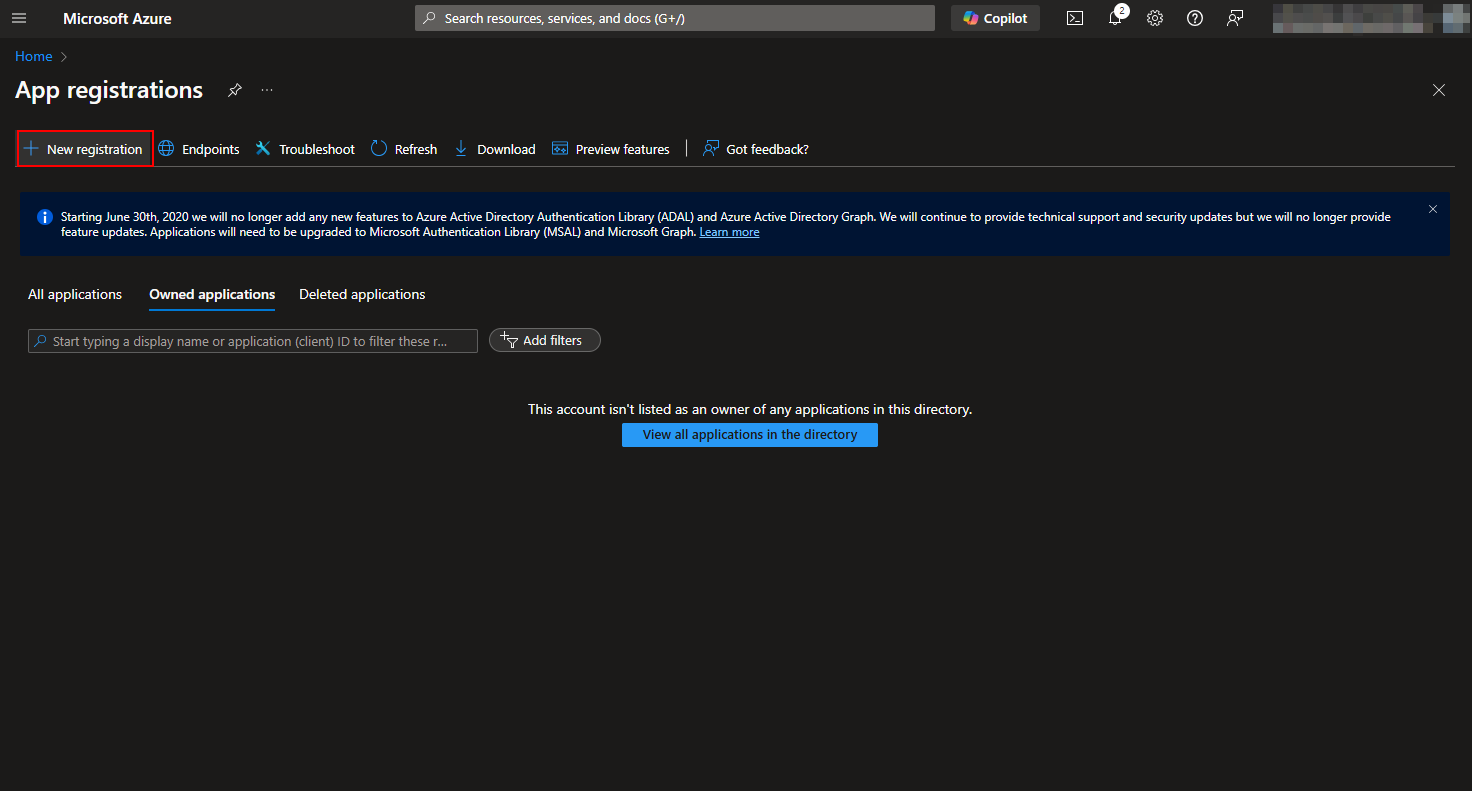
Name it e.g. “Enterprise Glossary - Power BI”, set it to “Accounts in any organizational directory (Any Microsoft Entra ID tentant - Multitenant)” and register
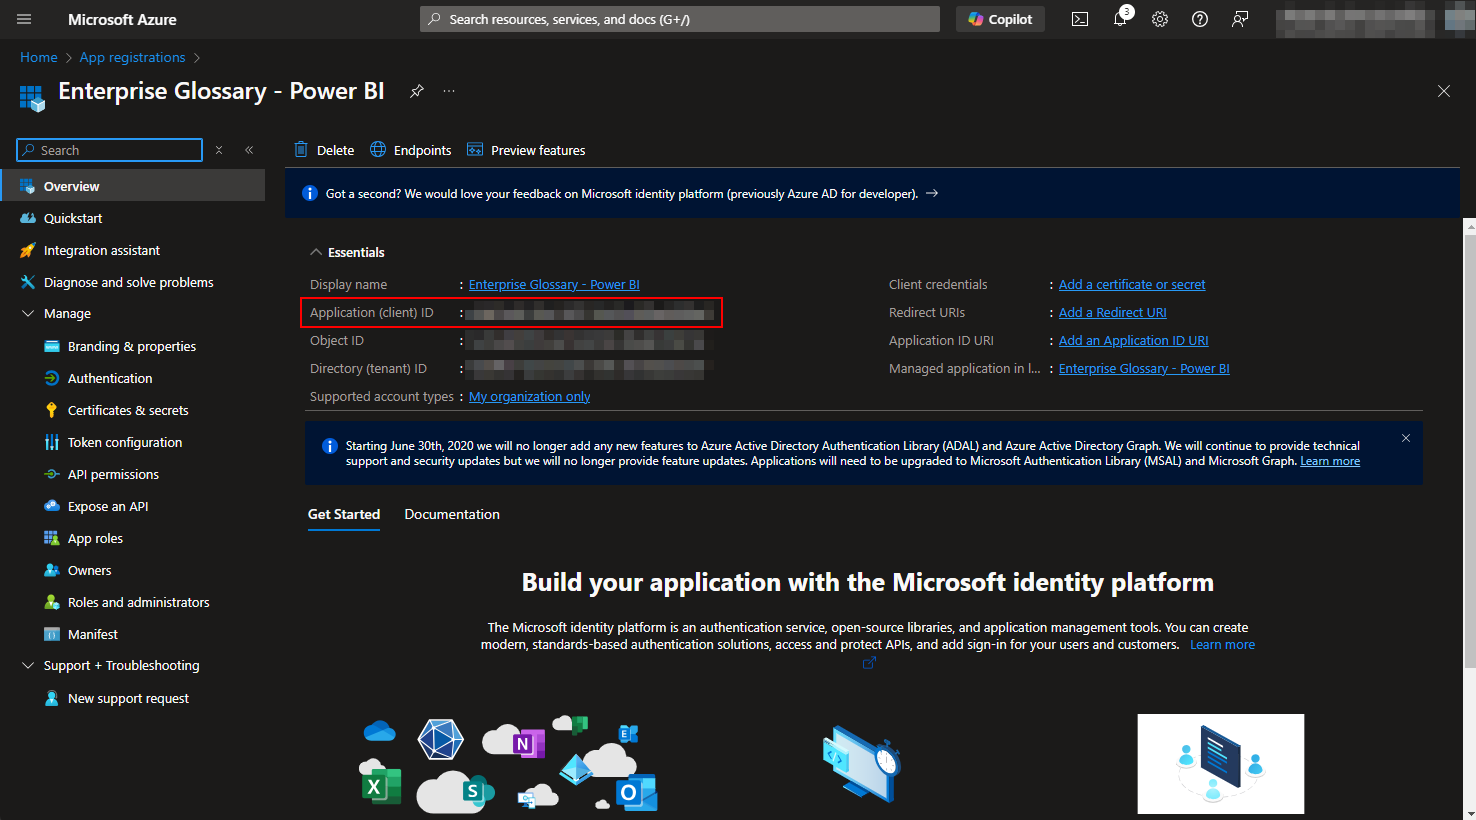
On the next page the Application (client) ID is what is needed for as Client ID in the Power BI connection in Enterprise Glossary.
Create Secret
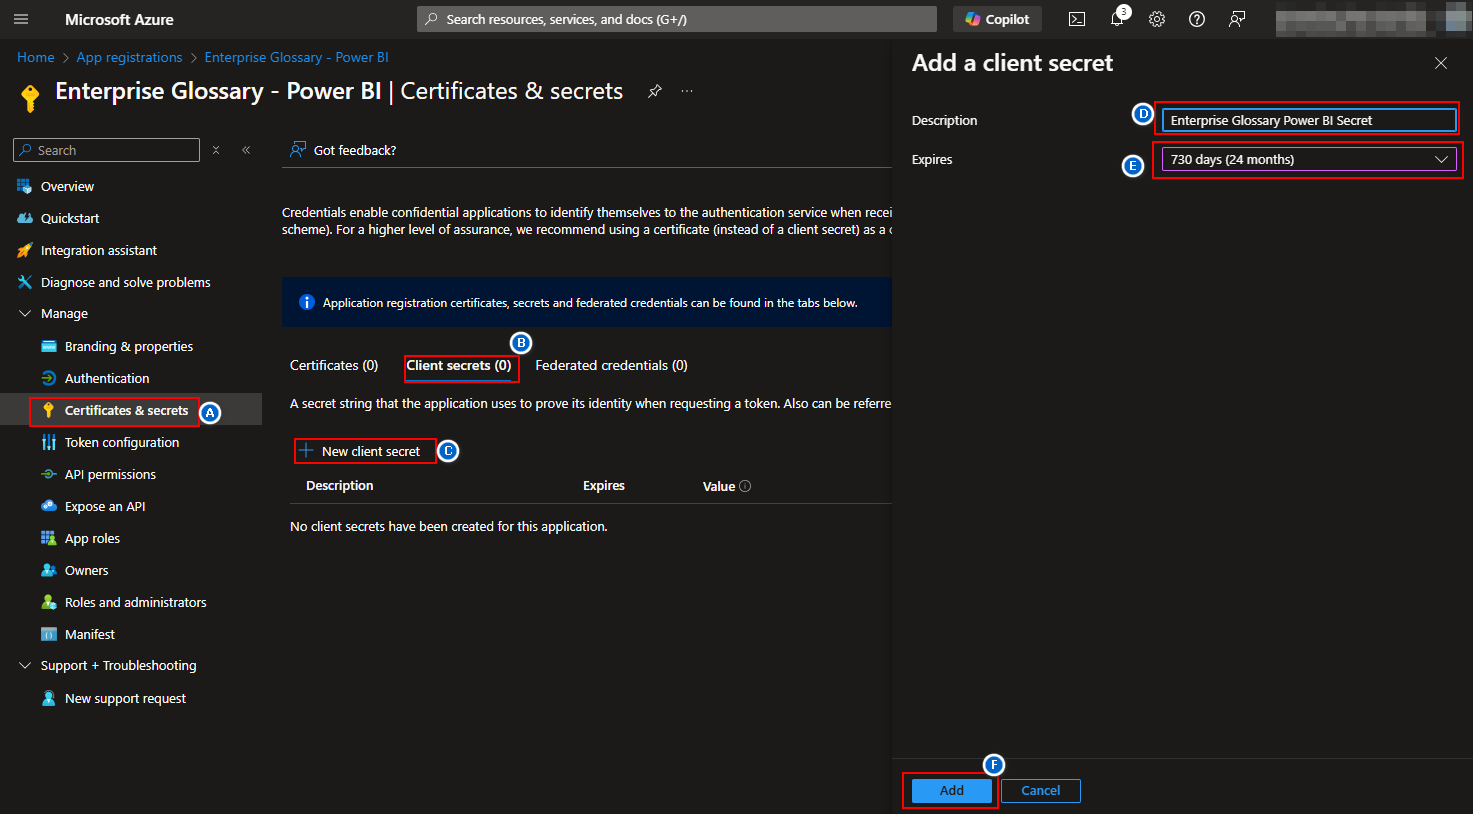
Go to “Certificates & secrets”
Choose “Client secrets”
Select “New client secret”
Enter a Description (e.g. Enterprise Glossary Power BI Secret)
Enter Expires value (e.g. 24 months)
Click “Add”
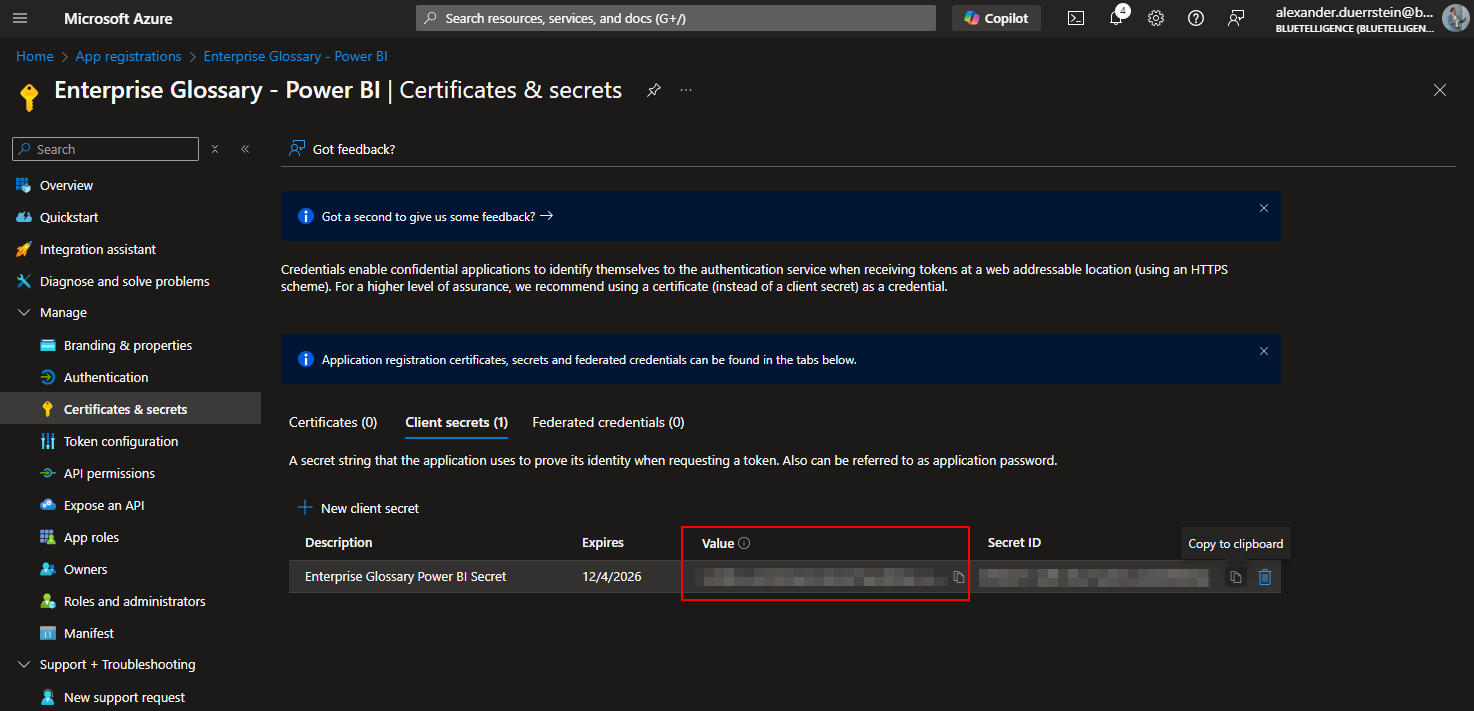
Copy Value of the next page as Client Secret
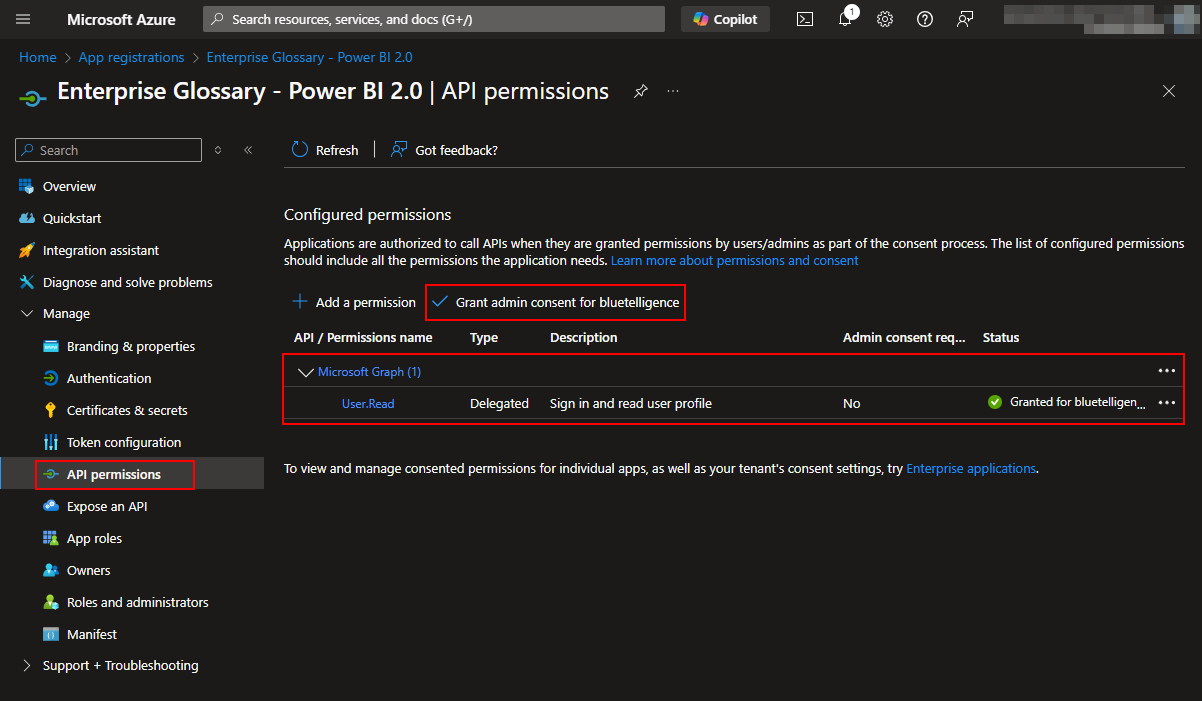
Assign User.Read Permission of Microsoft Graph by going to API permissions and pressing “Grant admin consent for xxx”
Create Group in Entra ID
Create Group in Entra ID
Go to Microsoft Entra ID

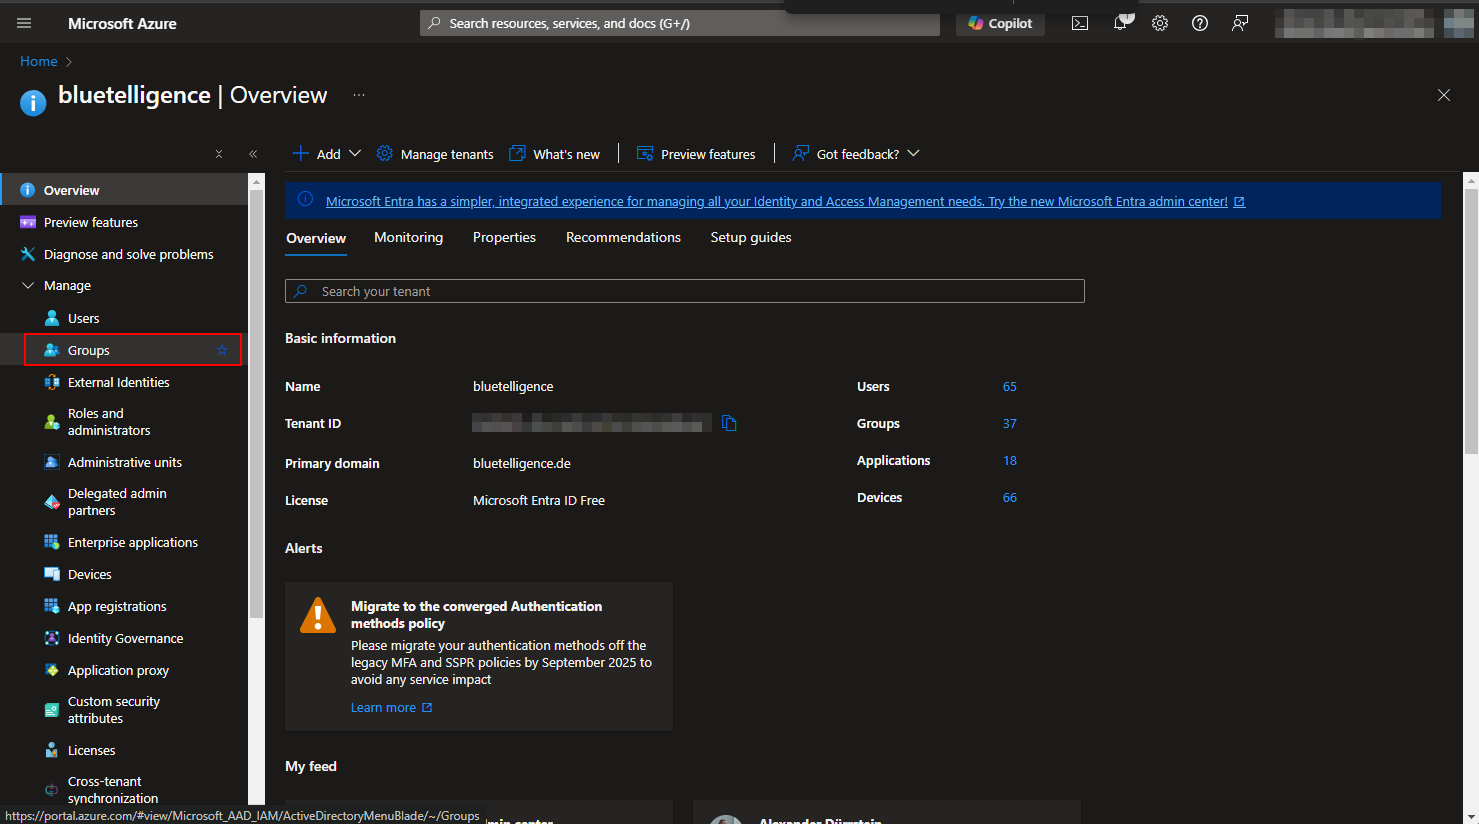
Go to groups
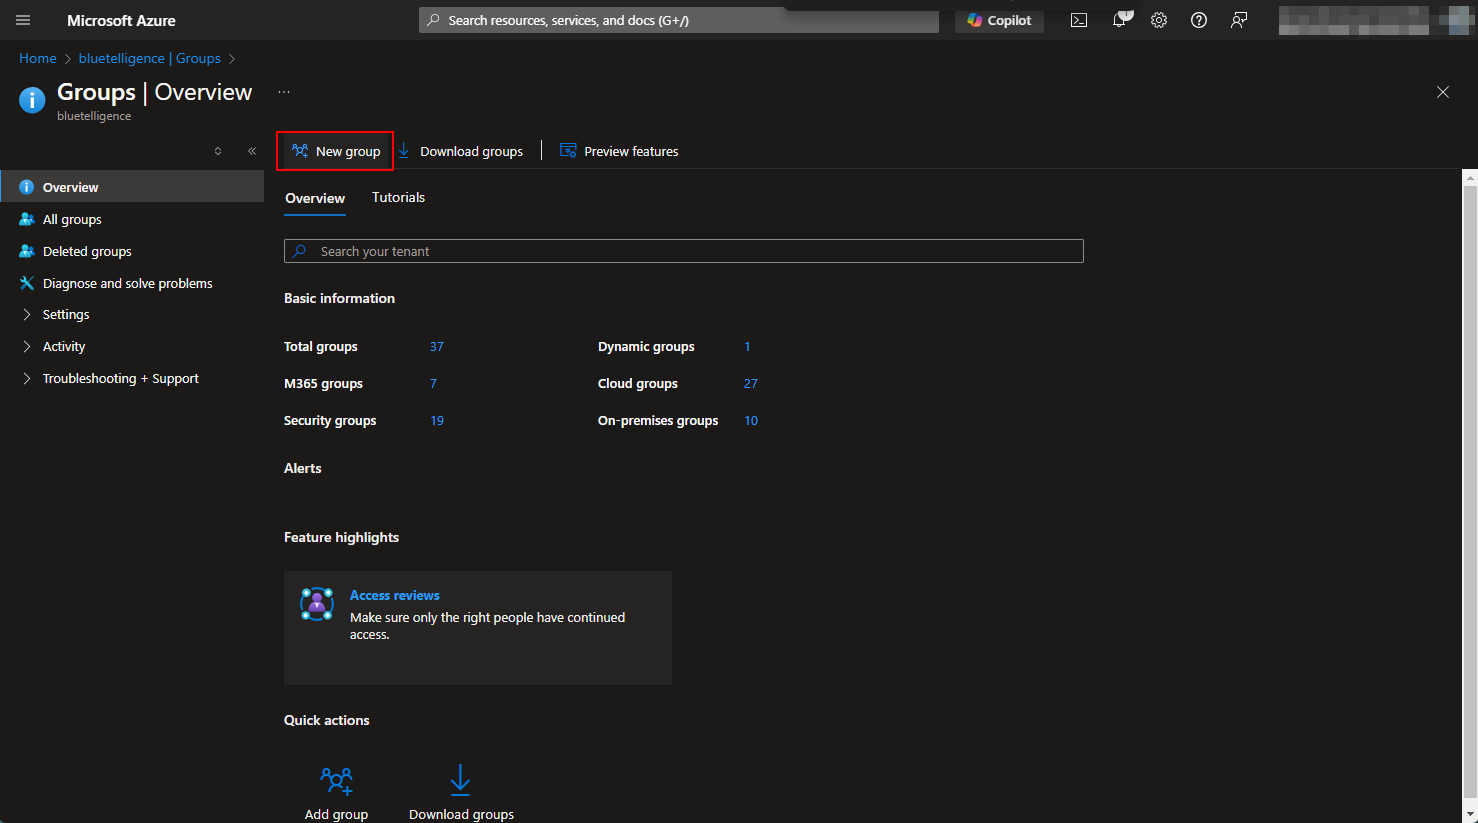
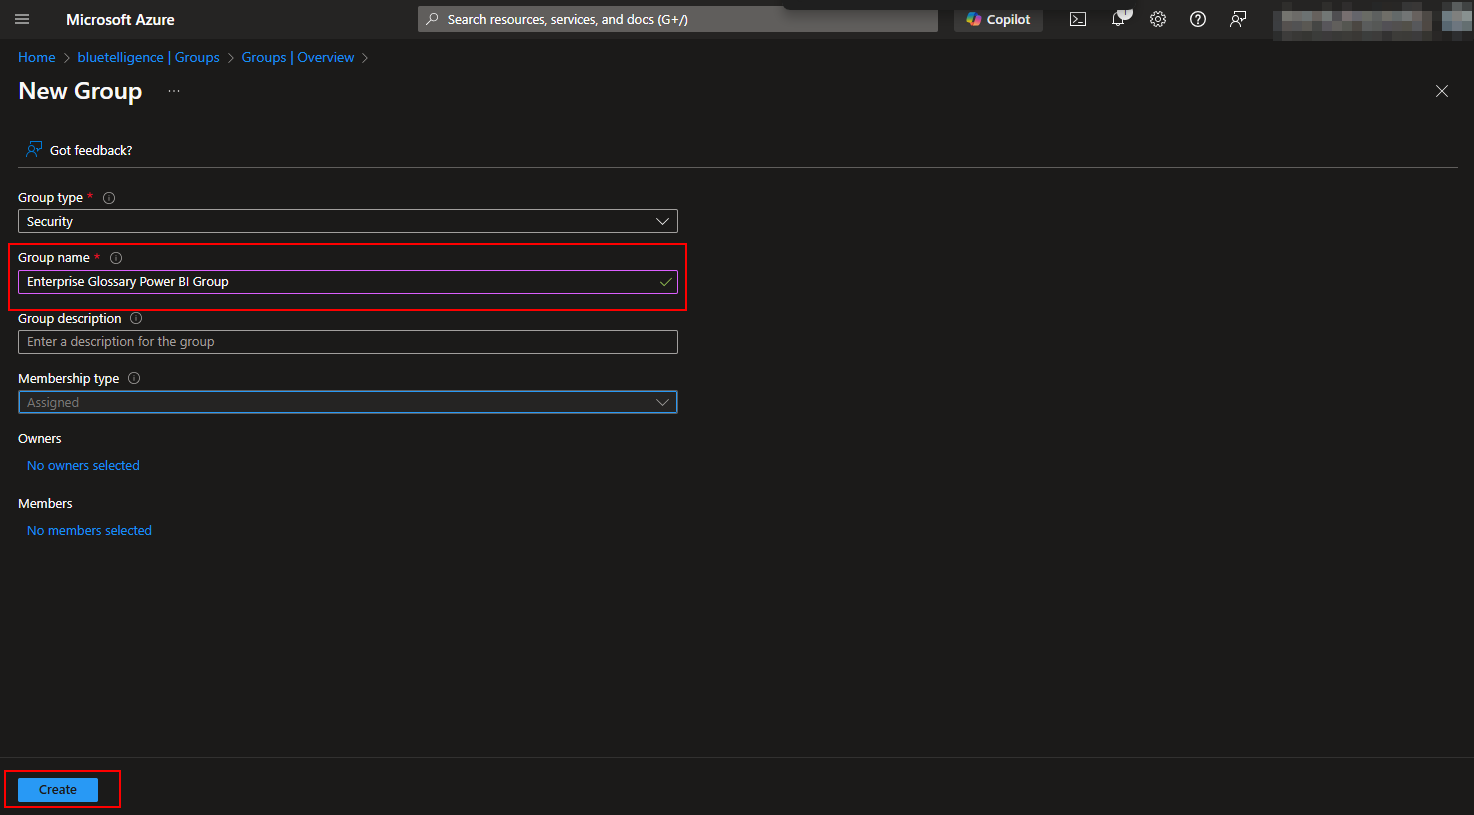
Add a new group
Insert a group name (e.g. Enterprise Glossary Power BI Group)
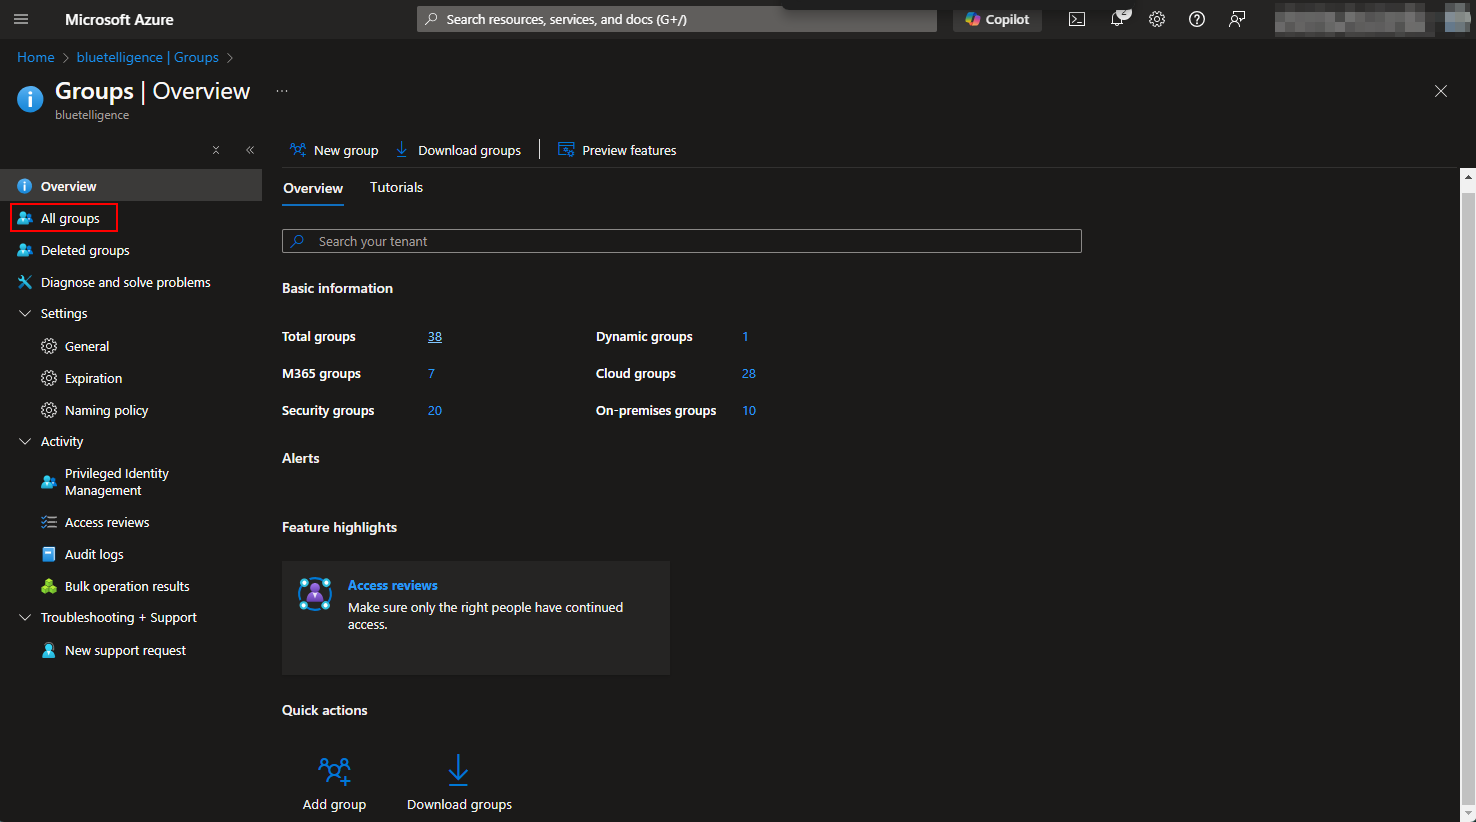
Go to All groups
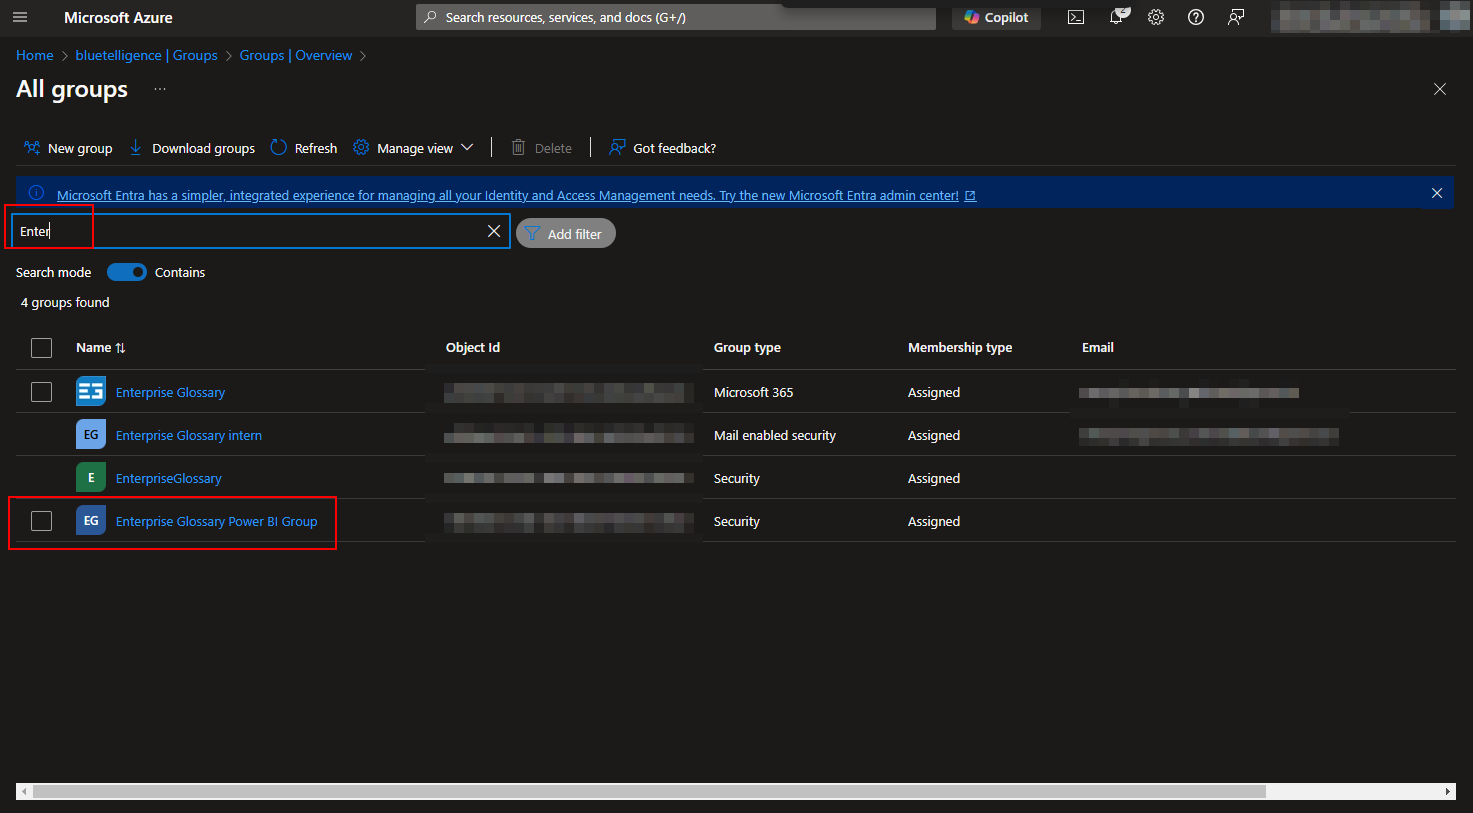
Search the group and select it
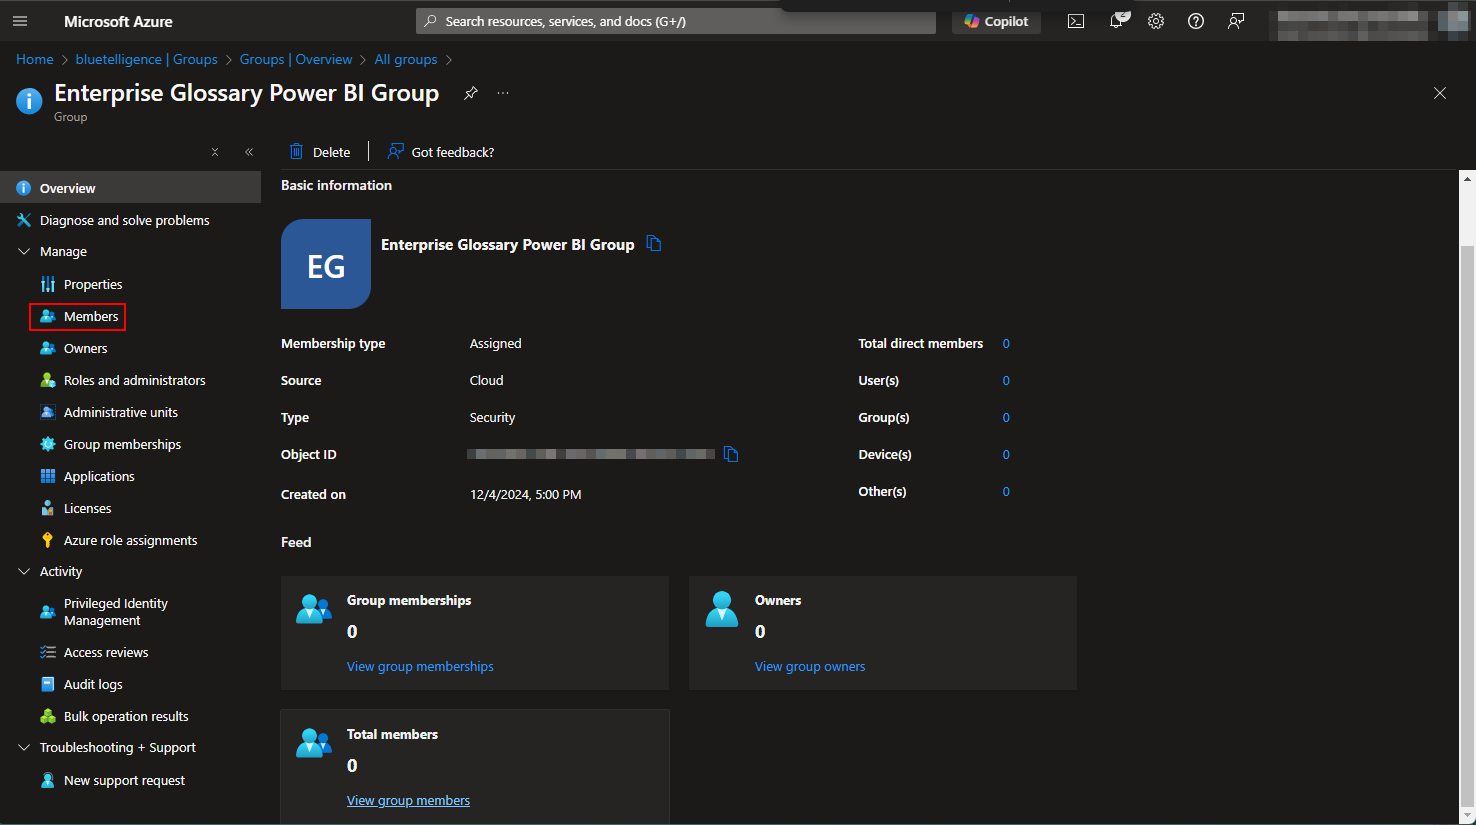
Select Members
Select Add members
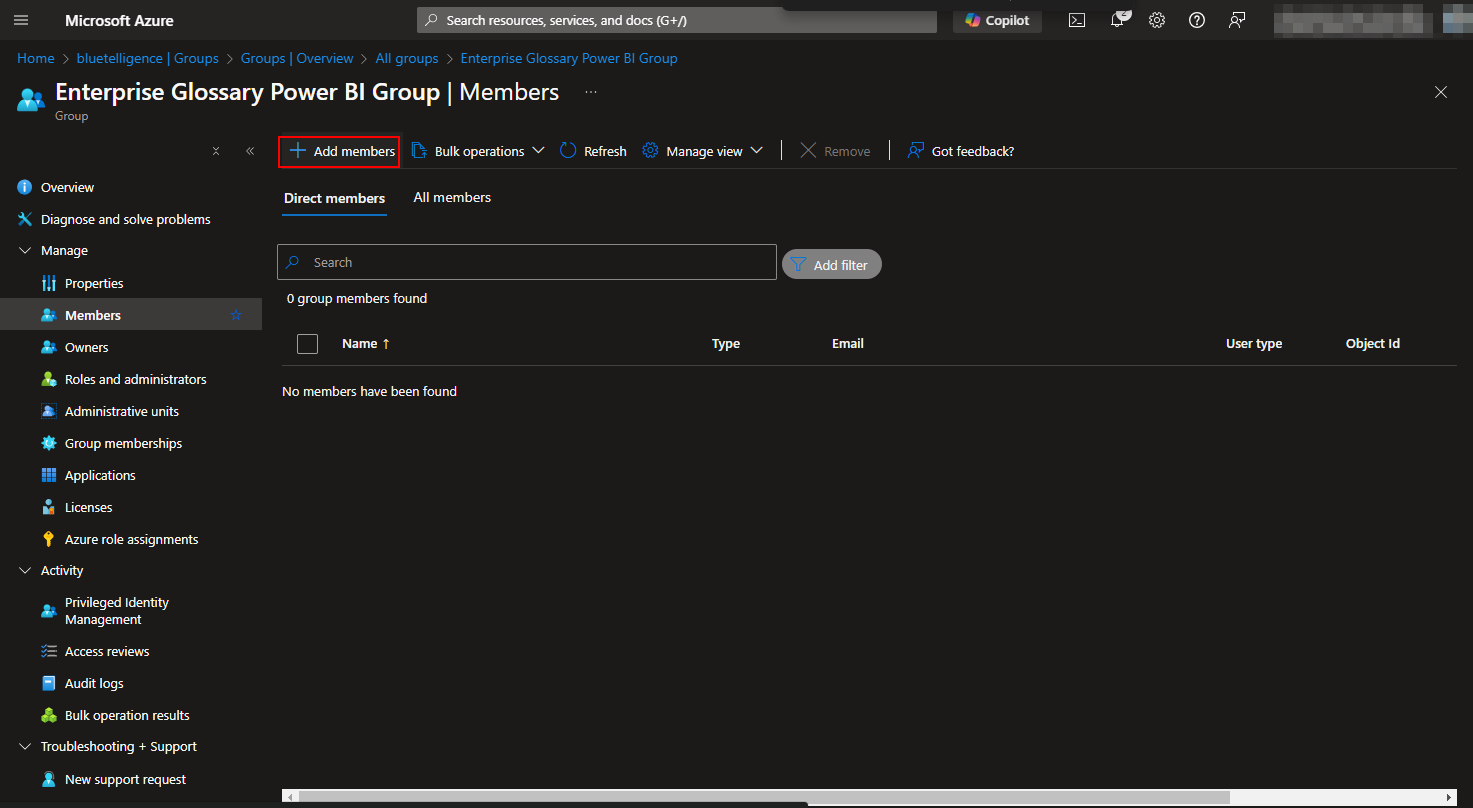
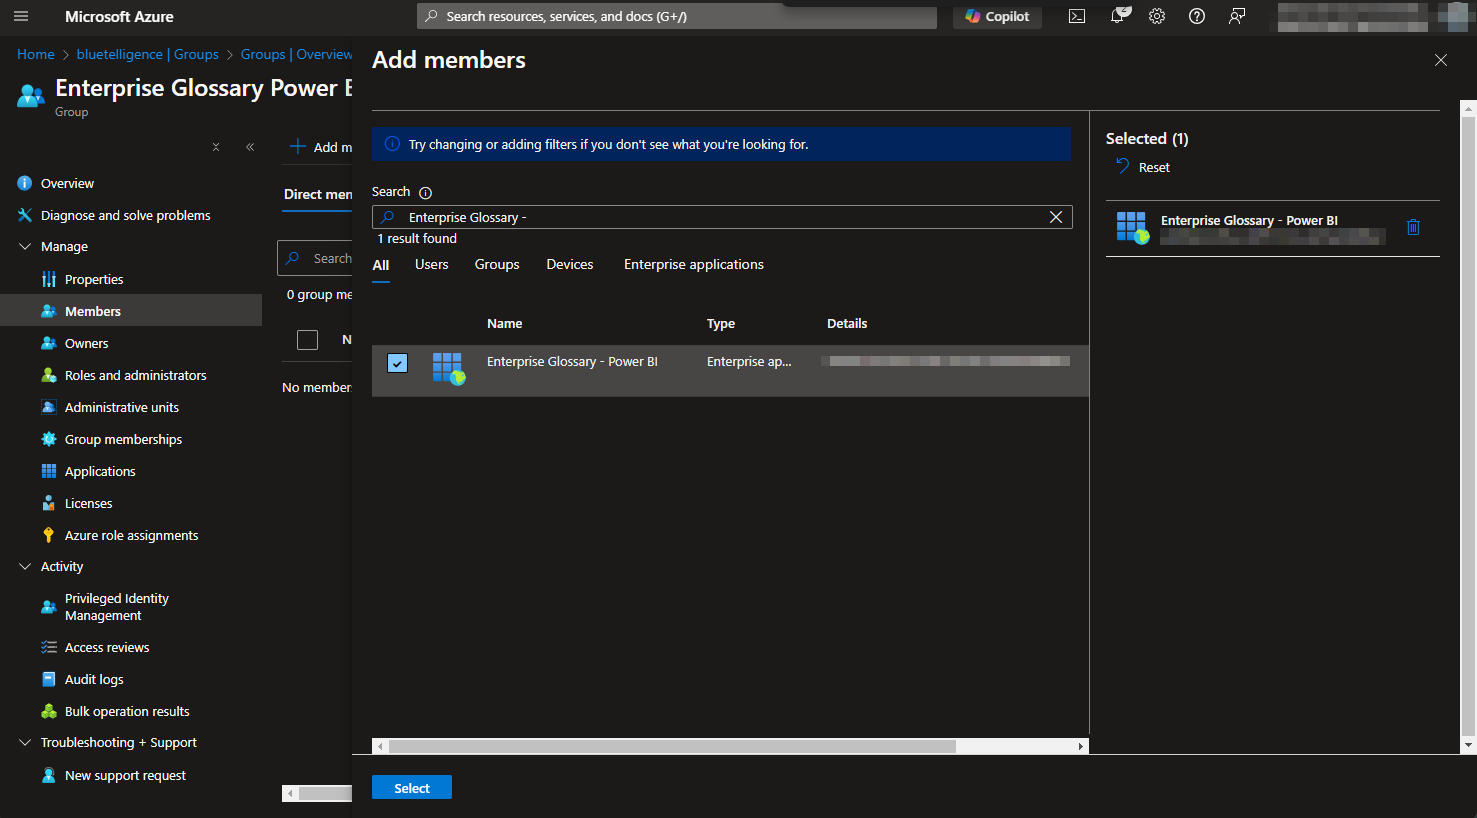
Select the App you created above in step 3 (e.g. Enterprise Glossary - Power BI)
Power BI
Open the Power BI Admin Settings https://app.powerbi.com/admin-portal/tenantSettings?experience=power-bi
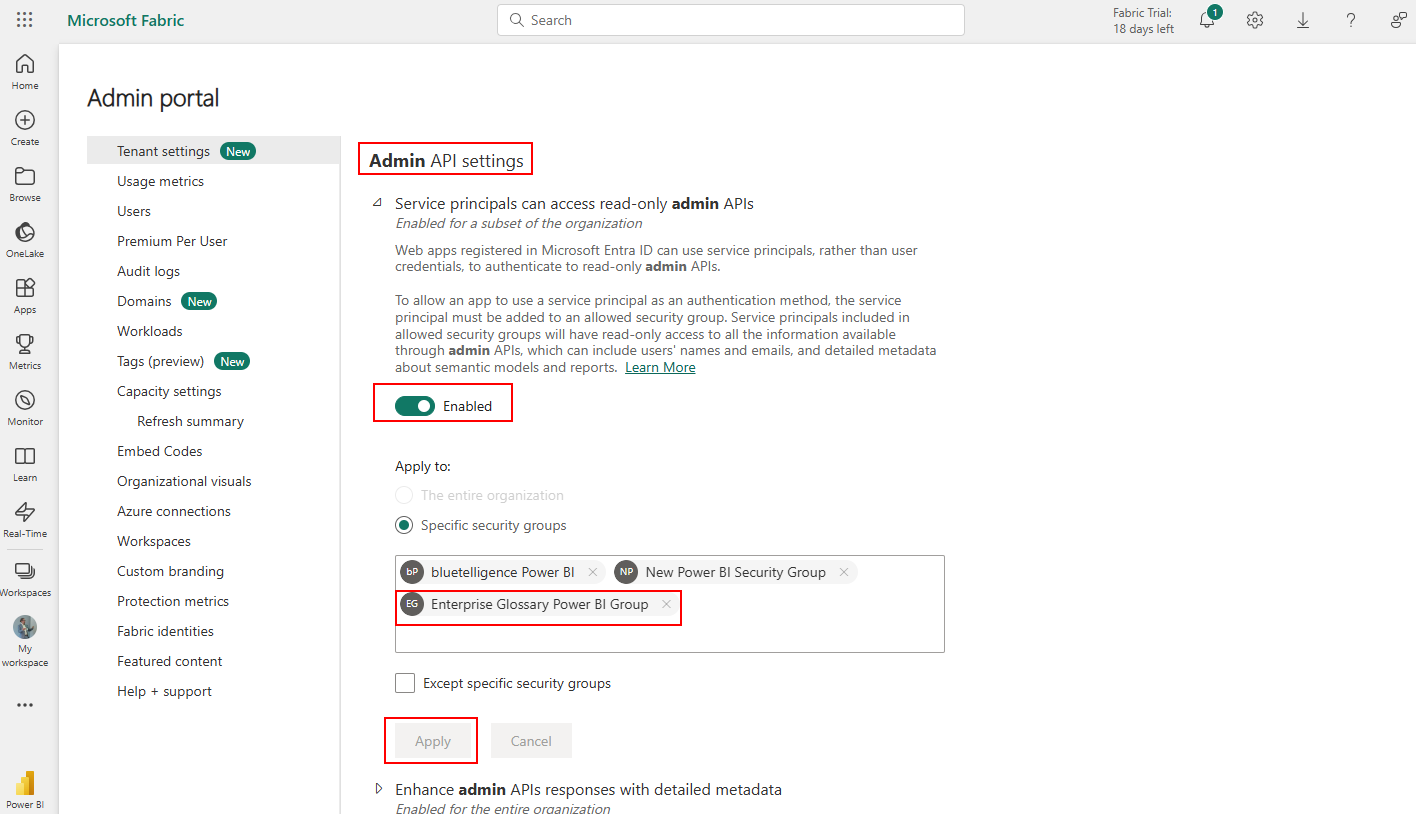
Find the category Admin API settings and maintain it
Enable the “Service principals can access read-only admin APIs”
Insert the created security group
Apply it
