Entra ID
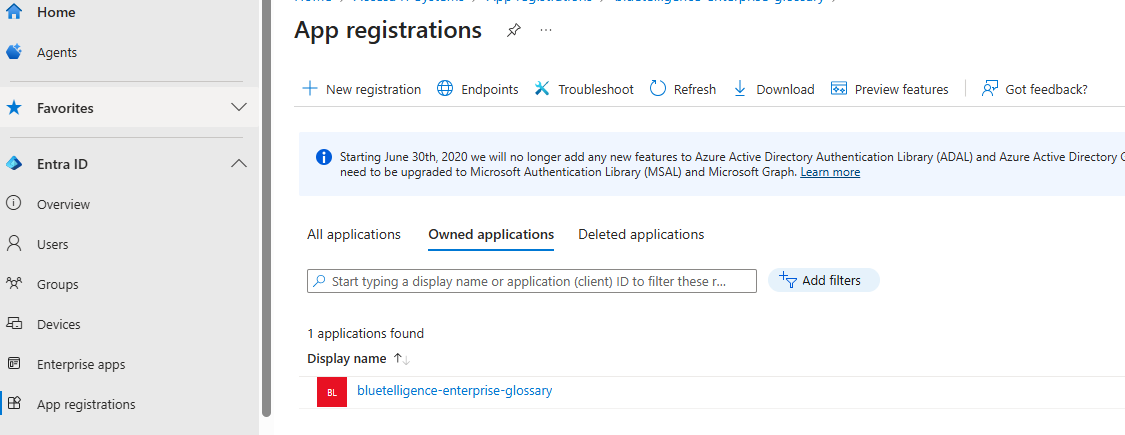
In order to setup Entra ID for Enterprise Glossary, the app needs to be registered in Microsoft Entra admin center.
Go to https://entra.microsoft.com/ and navigate to App Registrations in the left side panel:
Click on “+ New Registration” and insert a name for the app. This name is just an identifier inside Entra ID admin panel. In the “Redirect URI” section, select “Single-page application (SPA)” as platform and input the “[EG instance URI]/auth”.
endpoint: https://host.de/ then redirectUri becomes https://host.de/auth
Navigate to “Certificates & secrets” and add a “New client secret”
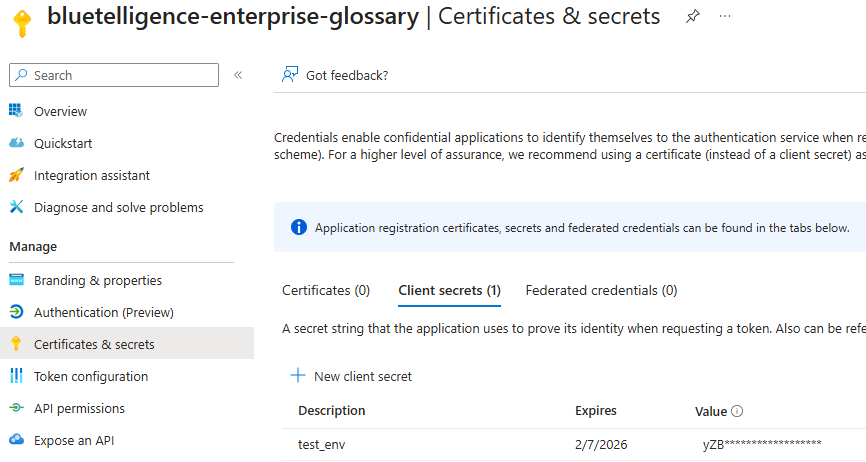
Save the secret “Value” before exiting the page, since it cannot be copied afterwards. This secret “Value” is used for reading Groups and Users inside Microsoft Entra directory and is set in the “Client Secret” field.
Setup application scopes and authorization
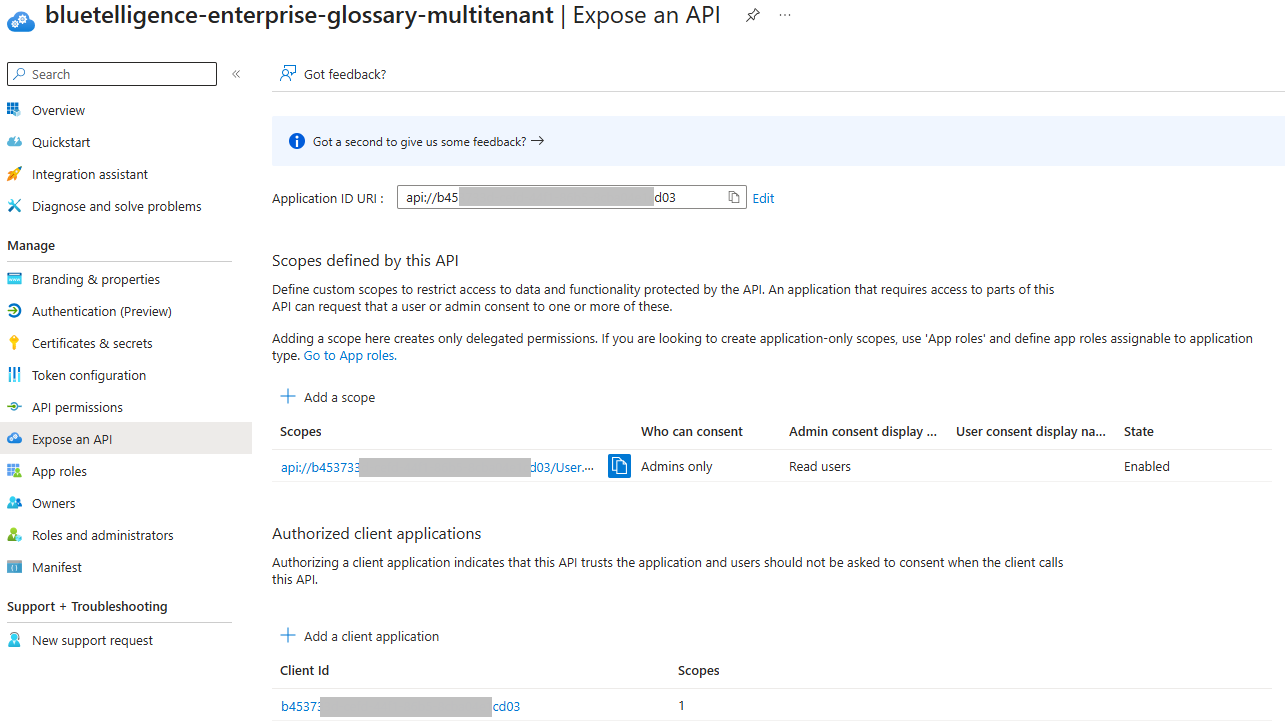
You need to create the application ID URI and then define a scope. Usually User.Read should be enough. Afterwards add the client application and assign it to the Scope.
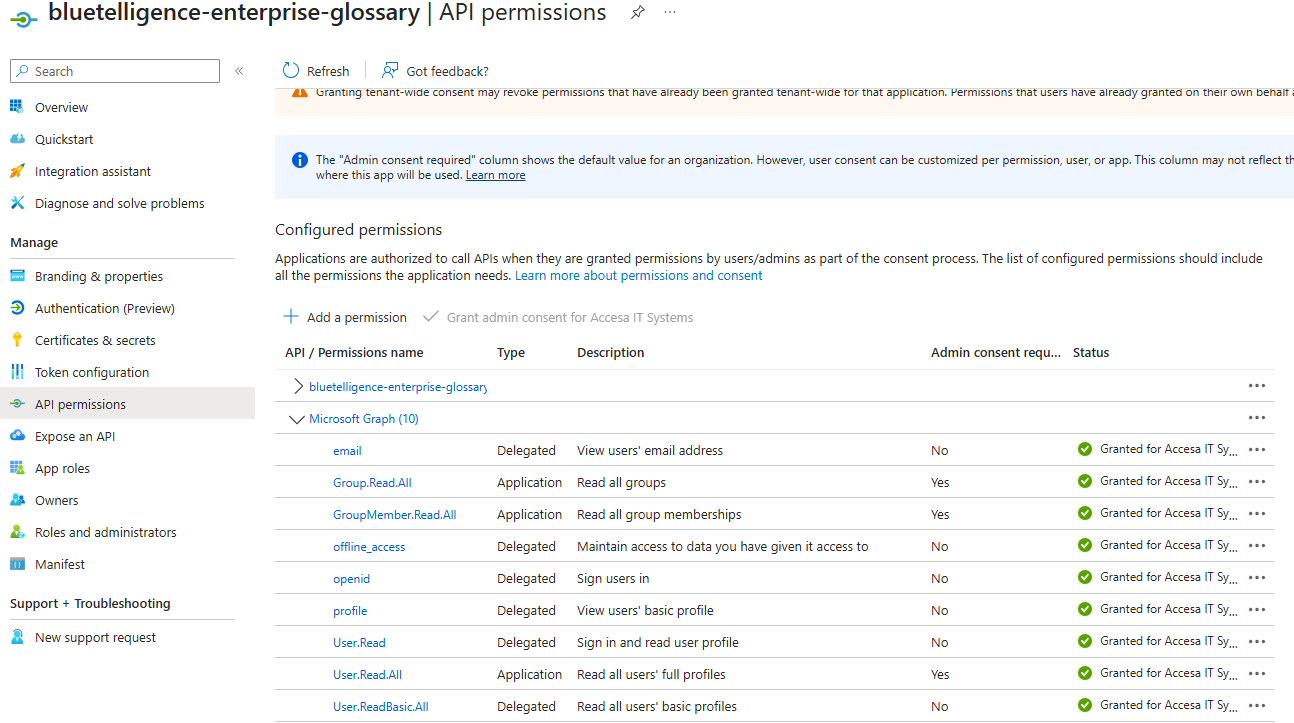
Setup API permissions for EG
Add the following permissions
Type | permission |
|---|---|
Delegated | |
Delegated | offline_access |
Delegated | openid |
Delegated | profile |
Delegated | User.Read |
Delegated | User.ReadBasic.All |
Application | Read all groups |
Application | GroupMember.Read.All |
Application | User.Read.All |