Installation & Update Sync Service
Installation
Unzip File
There is no installation routine or wizard for the installation. Extract the zip file to the directory from which you want to run the service permanently.
Perform Installation
Select SyncService.exe in this directory and right-click to open the context menu to run the application as Administrator.
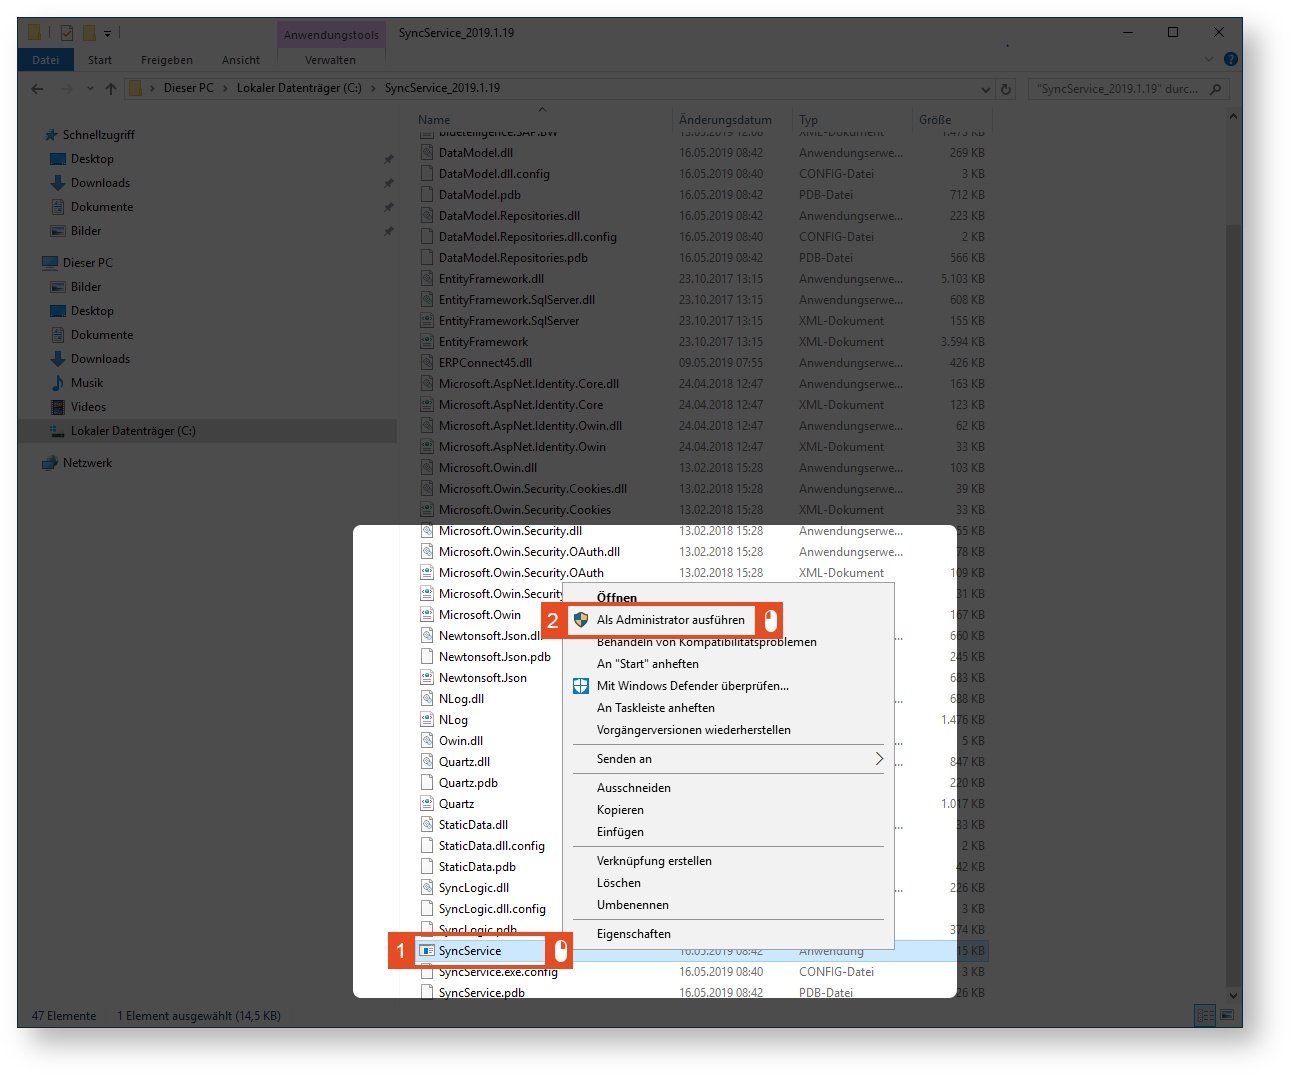
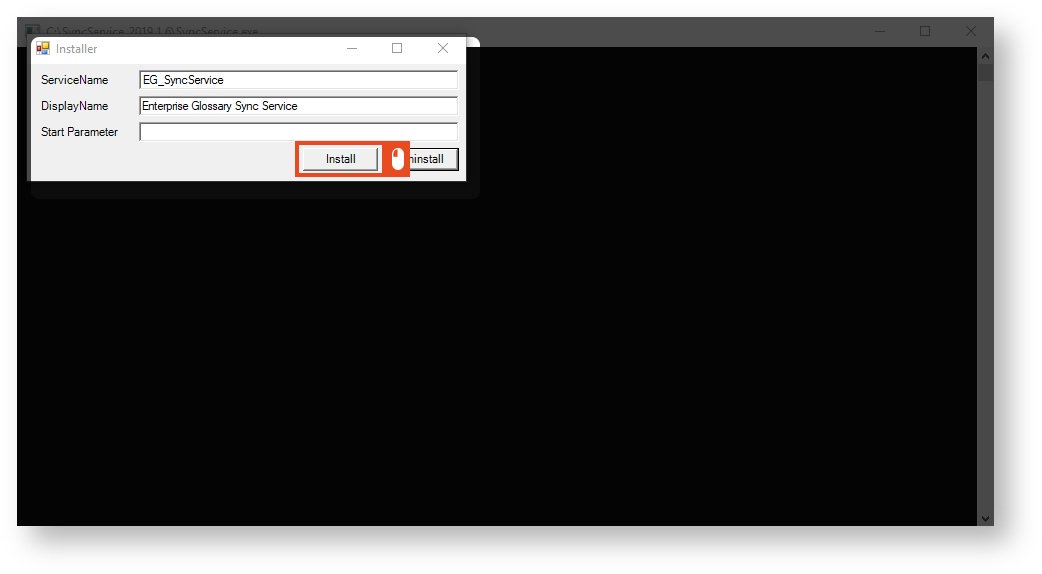
A popup window opens where you can make the following settings:
ServiceName | = Name for the Windows service |
DisplayName | = Displayed name for the Windows service |
Parameter | = path to configuration file Ex: -configFile: "E:\SyncService\Config2.xml" This parameter usually does not need to be changed, if the configuration file |
Usually, the preset values can be used. Click Install to start the installation.
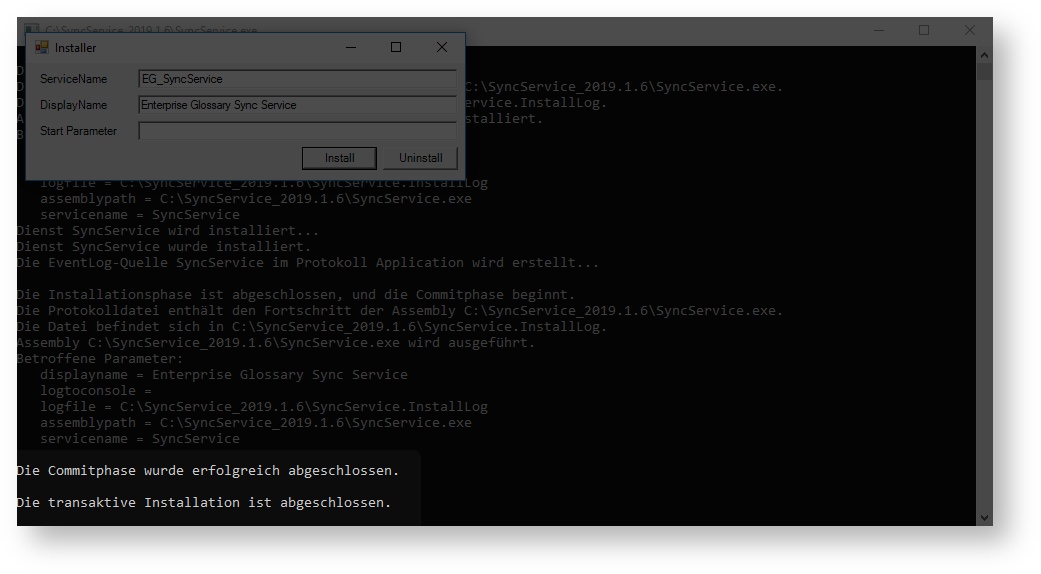
The installation is complete when you see the following messages in this window:
The commit phase was successfully completed.
The transacted installation is completed.
The windows can now be closed.
Setup
Configure Synchronization
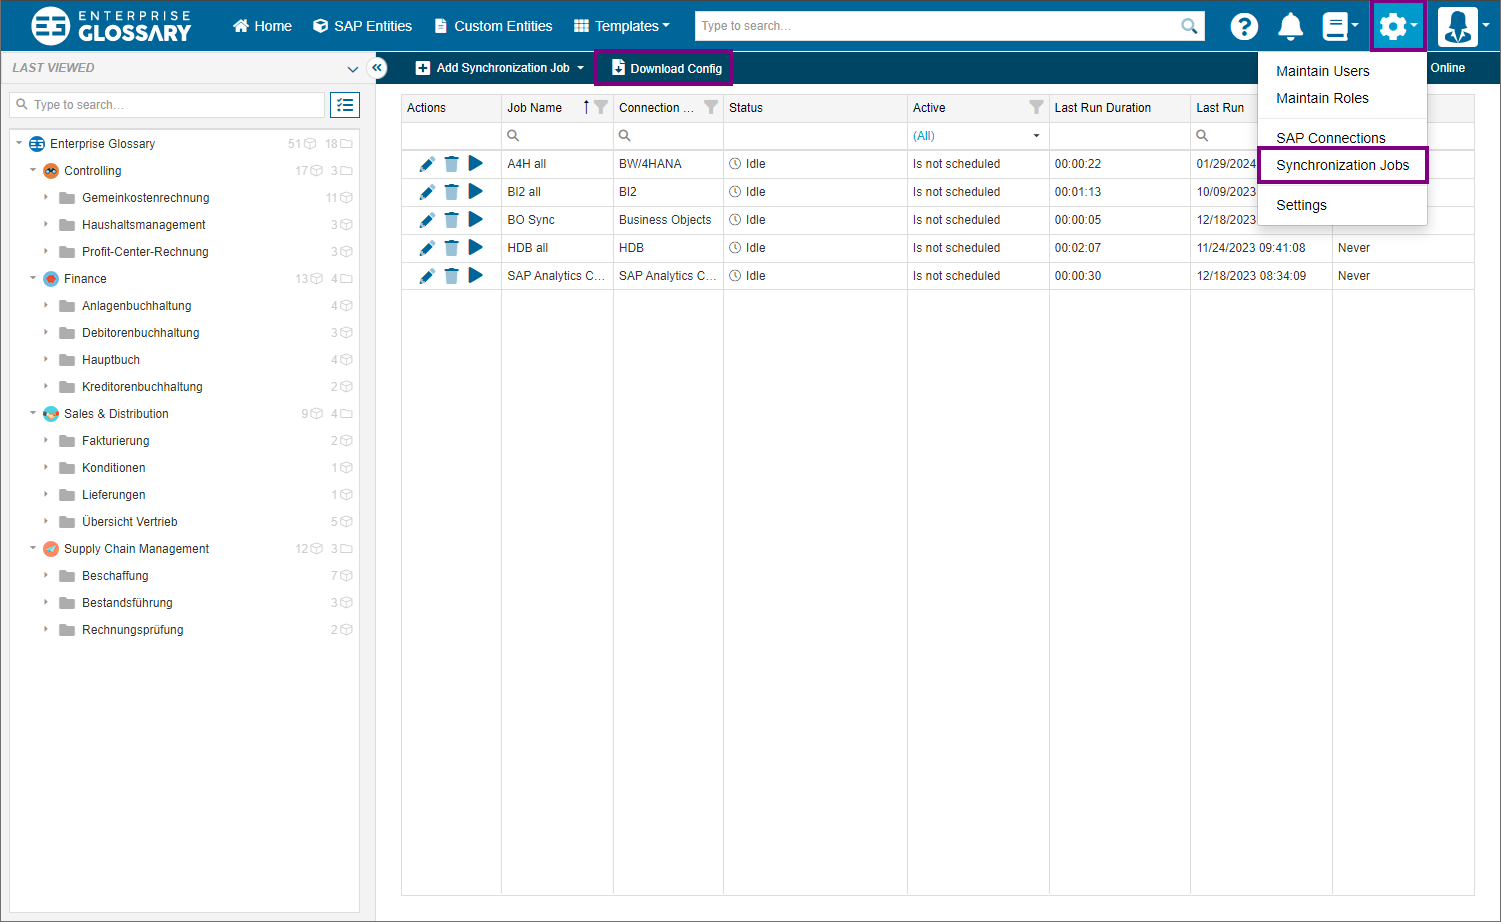
The service must first be configured to connect to the desired Enterprise Glossary. Log in to the Enterprise Glossary with an administrator user. In the settings menu in the upper right corner click Synchronization Jobs and then Download Config to download the configuration file for the synchronization service.
Copy the saved Config.xml file to the installation directory of your Enterprise Glossary Synchronization Service.
Without the Config.xml file, the service cannot be started under Windows Services.
Start Service
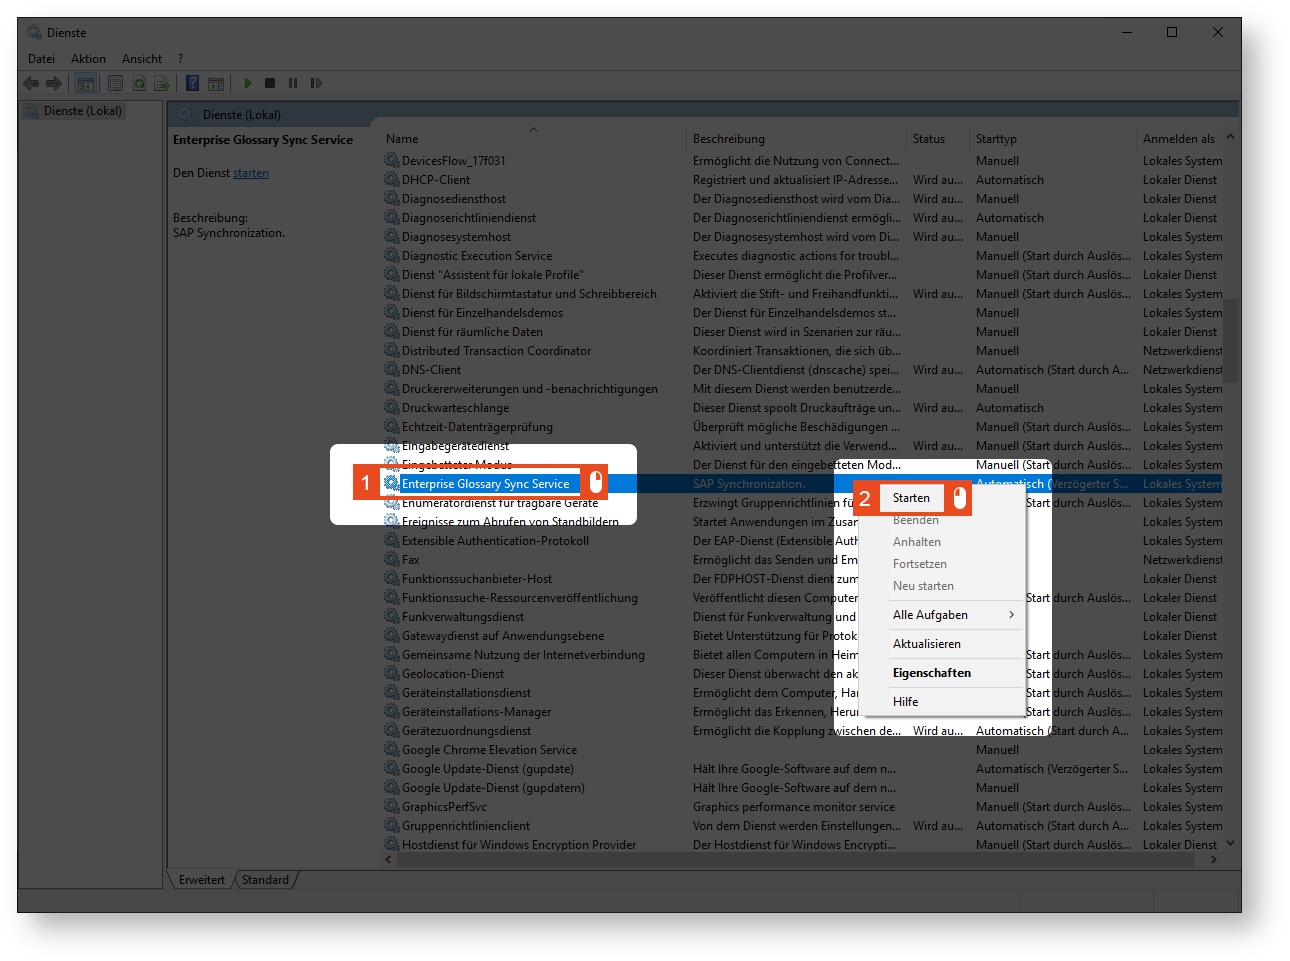
In the overview of Windows services, select the Enterprise Glossary Sync service with the right mouse button. Restart the service by clicking Restart in the context menu. If the Service if already stopped you can start it by clicking Start in the context menu.
Verify the successful installation of the service in the Enterprise Glossary under Connectors > Synchronization. The status of the Synchronization Service should now show "online".

Update
To update the Synchronization Service, stop the Enterprise Glossary Sync Service in the Windows Service overview. Now unzip the new files and copy them to the directory, where your service runs. If you get a message that there are files with the same name in the destination, click Replace files in destination. Finally, you can start the services again.
