Installation Enterprise Glossary
Checklist
Please make sure that the following components of the IIS web server are present, especially if an existing IIS web server is used:
.NET Framework functions 4.6
ASP .NET 4.6
Windows authentication
WebSocket-Protokoll
Administrative Service
Requirements: Web Deploy
Please note that Microsoft's Web Deploy 3.6 must be installed beforehand. This simplifies the deployment of web applications and web pages to IIS servers.
Detailed information about installation and configuration can be found in the following article: Configuring a Web Server for Web Deploy Publishing (Web Deploy Handler).
Requirements: ASP.NET Core 6 Runtime - Windows Hosting Bundle
The ASP.NET Core 6.0 Runtime - Windows Hosting Bundle must be installed on the web server.
1. Start Installation
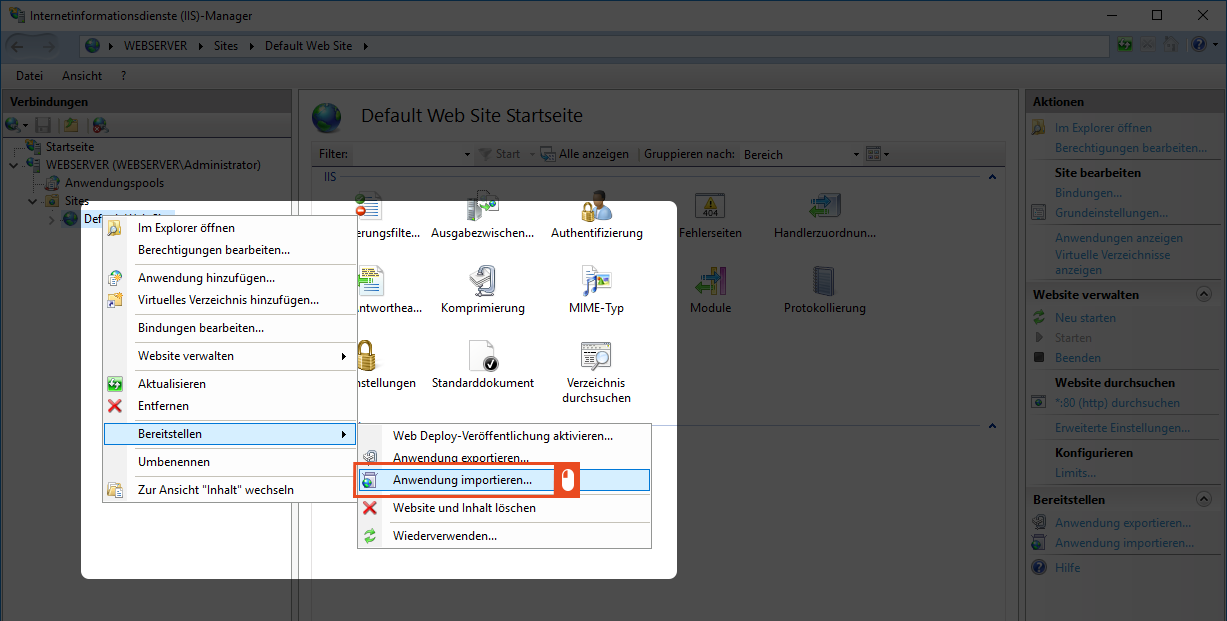
To download the software, a link to a zip file is provided by email (e.g. EnterpriseGlossary_2019.1.19.zip). Download this file to the target computer. You start the installation of the Enterprise Glossary via the Internet Information Services (IIS) Manager. There you will find the Default Web Site under Sites. Here you make a right-click on the menu item (Default Web Site).

This will take you to the Deploy function. In the next step, select Import Application.
2. Select Zip File
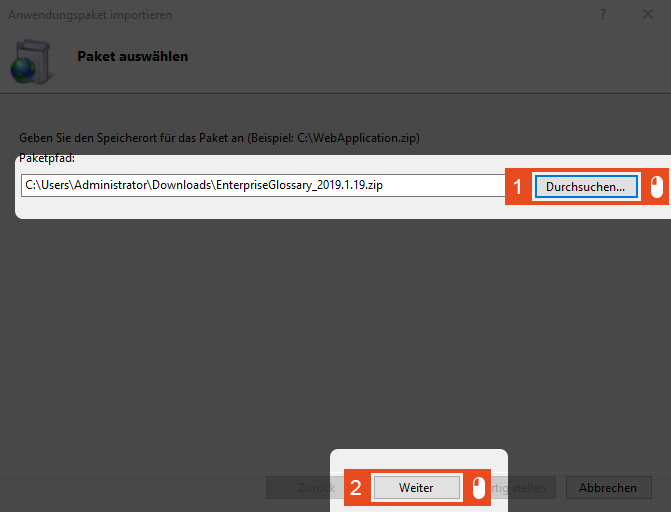
A new window will open where you enter the path to the zip file. Here, select Browse and the corresponding zip file. After that, click Next.
3. Select Packages
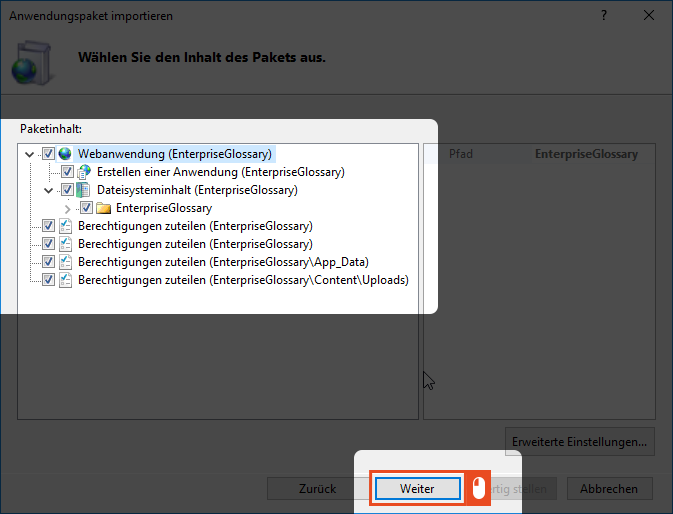
A new window opens where you can select the contents of the packages. In the default installation, all checkboxes are selected. This setting should not be changed. After that, click Next.
4. Application Path
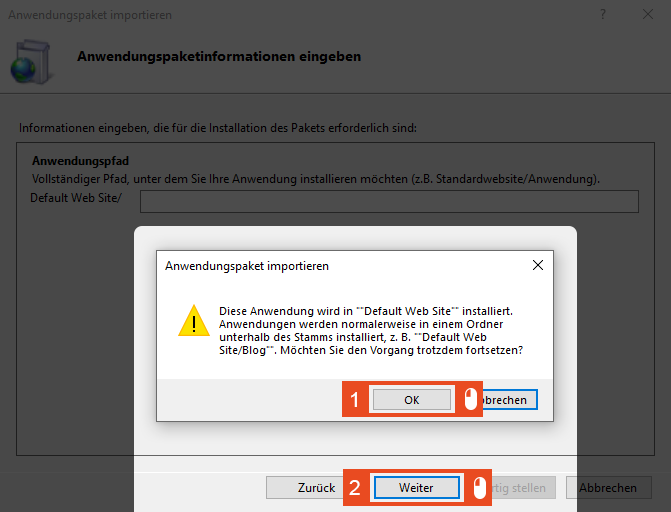
In the next step you will be asked if the application path should be customized. In the default installation, the application path is always EnterpriseGlossary. If you want to install the page on your Default Web Site, you have to delete the word EnterpriseGlossary here.
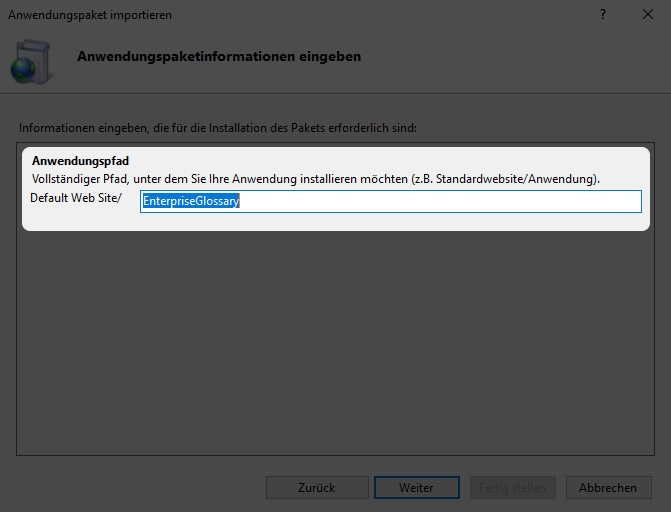
If you leave this field blank, a warning from the system will appear. This step can be confirmed with the Ok button and then with Next.
4.1. Optional: Customize Application Path
Optionally, the Application Path can be changed and confirmed with Next. An application can be configured completely autonomously and is installed in a special application path. This allows the installation of multiple applications within one website. As a consequence, when updating the application, the update has to be performed from the parent website, and the application path always has to be specified.
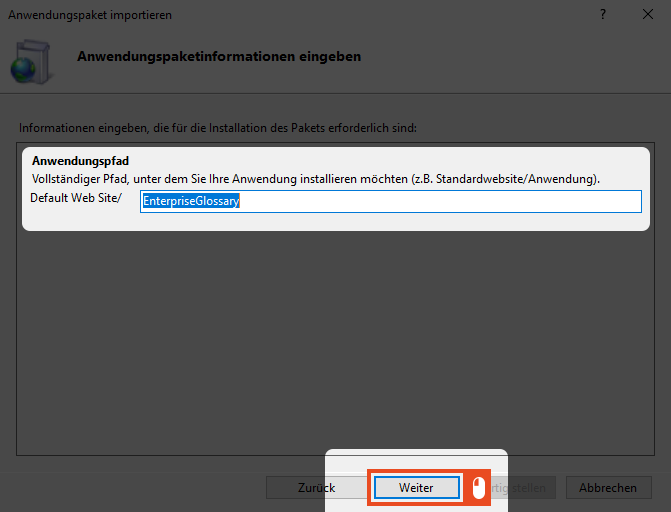
5. Finish Setup
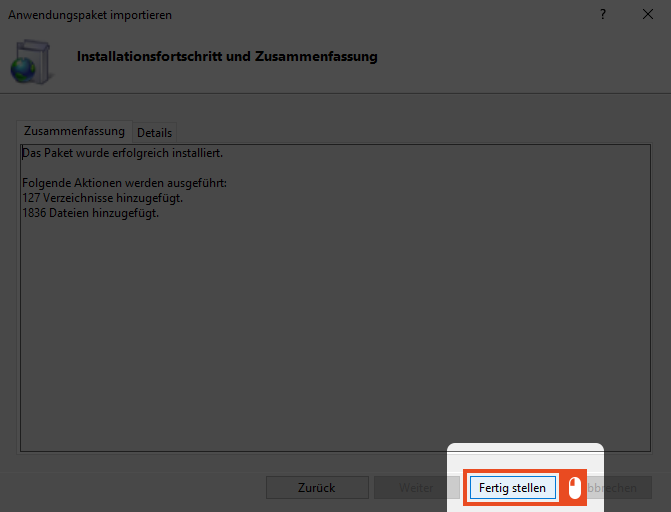
Complete the installation process by clicking Finish.
5.1 Optional: Customize index file
If you have adjusted the application path in the previous step (4.1), the index.html must be adjusted after completing the wizard. The index.html is located under ClientApp\dist.
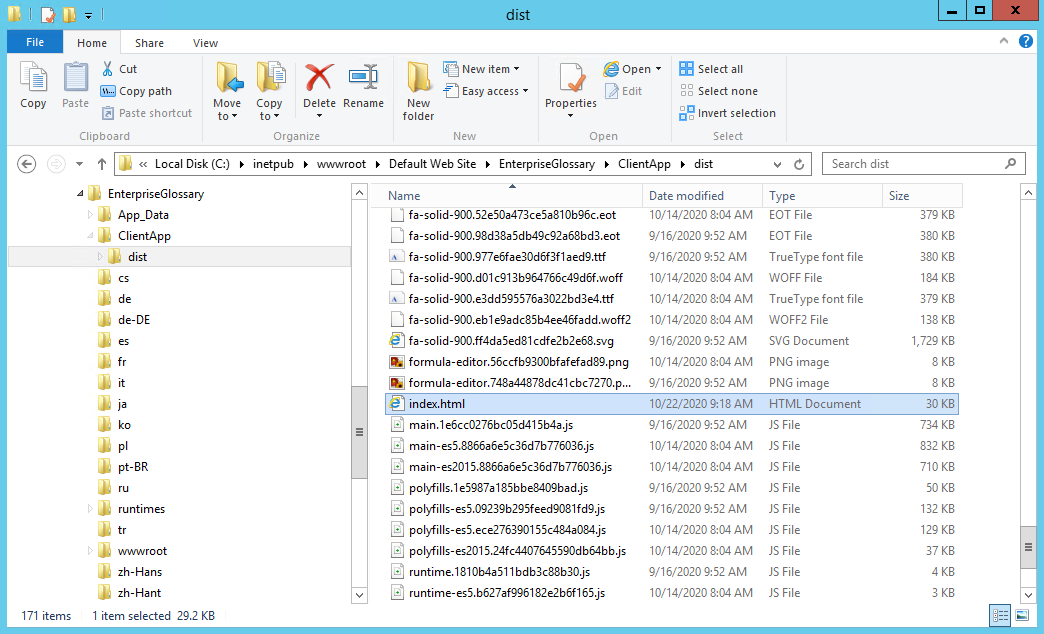
Initially, the Index.html looks like this:
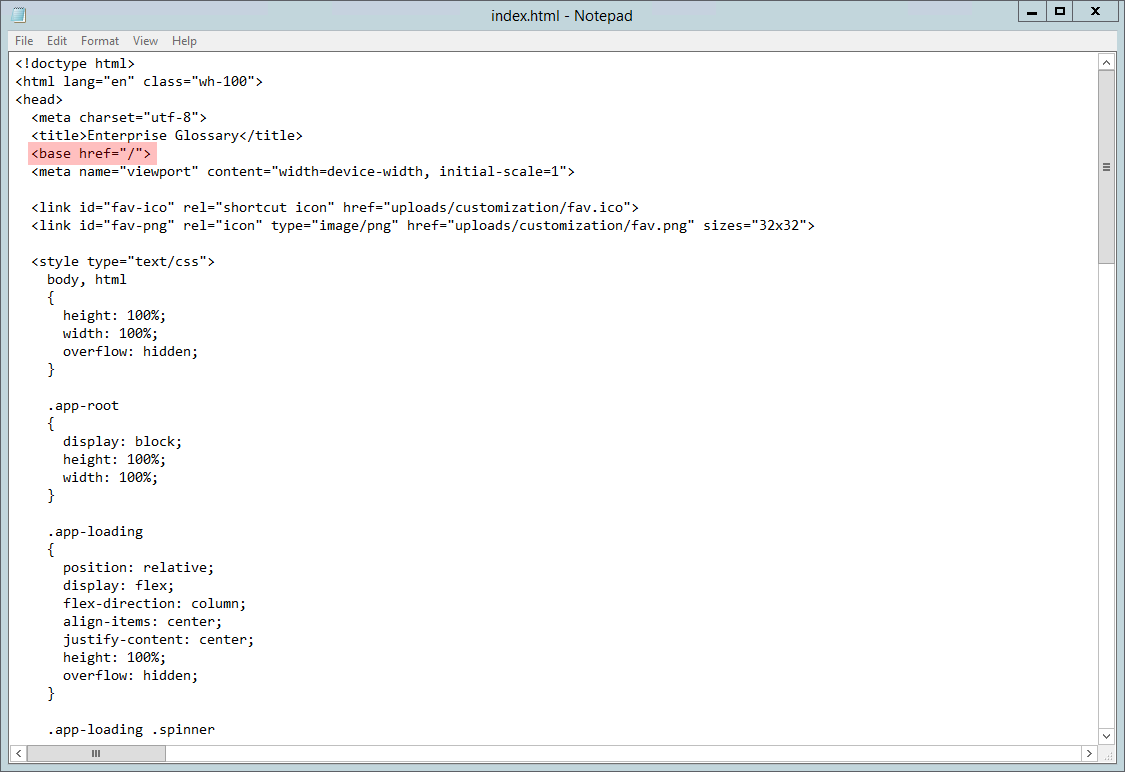
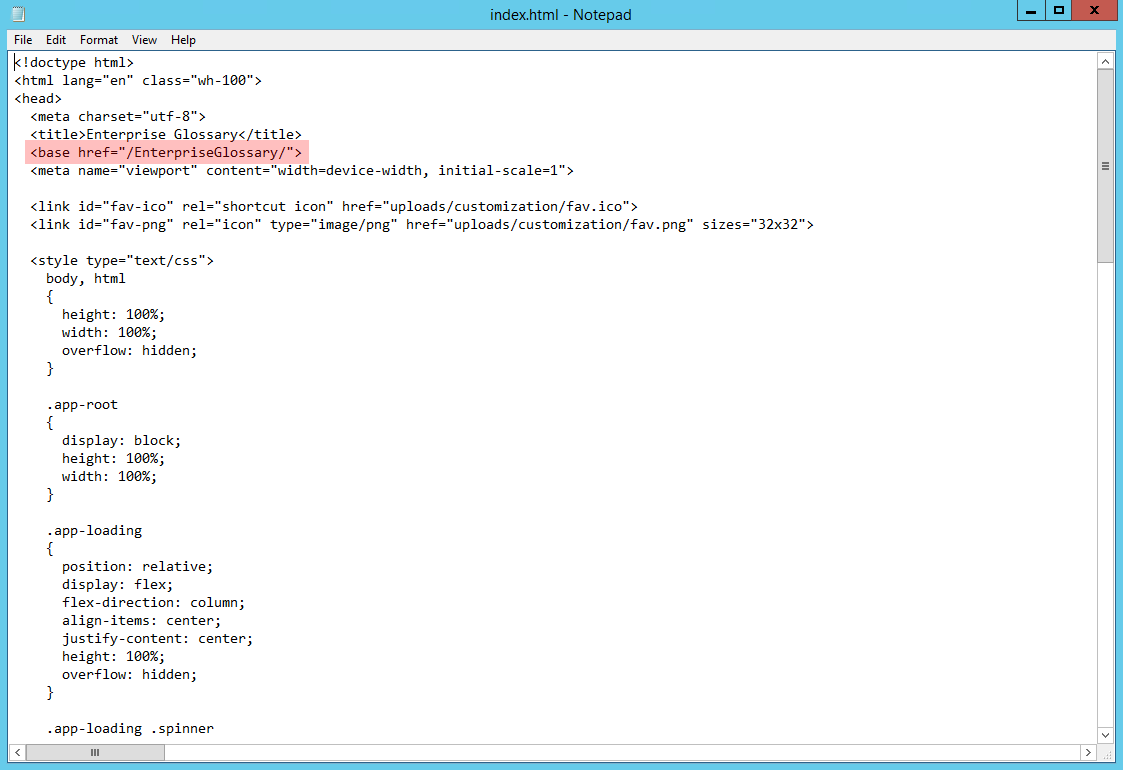
The <base href = "/"> must be changed to <base href = "/application path/">, for example, <base href = "/EnterpriseGlossary/"> if "EnterpriseGlossary" was selected as the application path.
6. Authentication
First select the Default Web Site, and then select Authentication from the Internet Information Services (IIS) Manager menu. If you have customized the Application Path (as described in step 4.1) you must select the application accordingly.

Please make sure that both Anonymous and Windows Authentication are enabled in the status column.

7. Advanced Settings
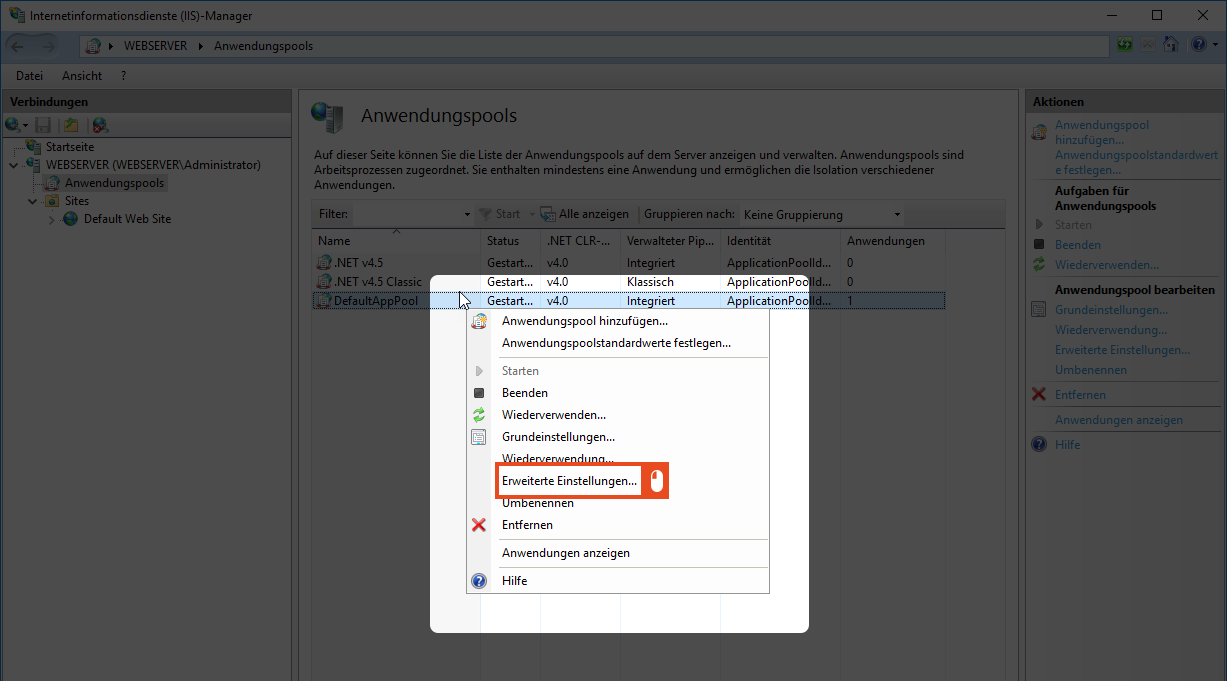
On the left side of the IIS Manager, under Connections, you will find the sub-item Application Pools. Right-clicking on the DefaultAppPool menu item displays another selection list.
Tip
If several websites/applications are operated on the web server, it is recommended to create a separate application pool.

Select the Advanced Settings... option.
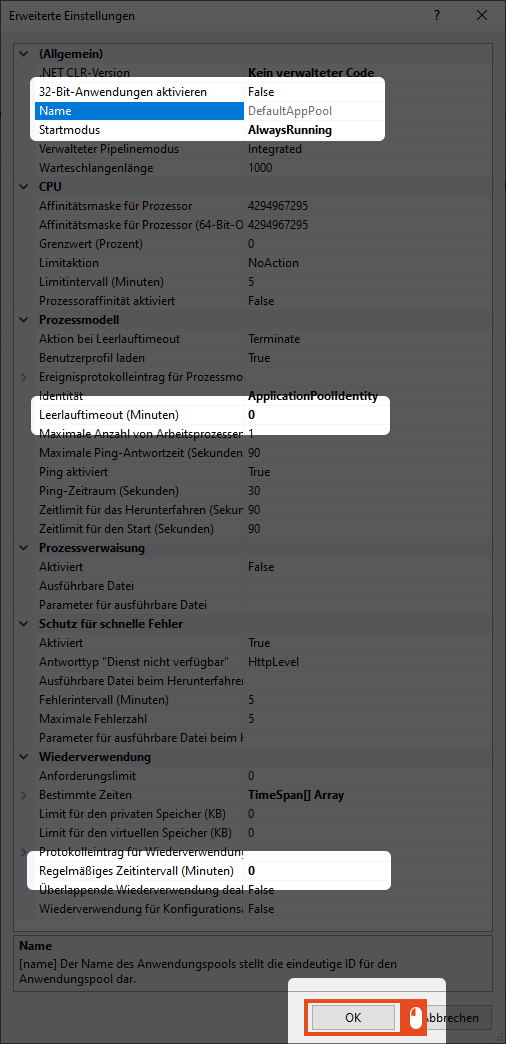
Please compare your settings with those in the following example to ensure proper functionality. Make sure that the following settings are identical and confirm everything with Ok. This completes the installation of the Enterprise Glossary.
.NET CLR-Version | = | No managed code |
Enable 32-bit applications | = | False For a 32-bit system, this parameter should be set to true |
Start mode | = | AlwaysRunning |
Idle timeout (minutes) | = | 0 |
Regular time interval (minutes) | = | 0 |
8. SAP-NetWeaver-RFC-Library 7.50
The RFC API (Remote Function Call) allows you to establish an RFC connection to an SAP system from an external system that can communicate with the SAP system as a client or server. On Windows, version 12.0 of the Microsoft C runtime DLLs is required. If these are not yet installed on your Windows system, you can download them directly from Microsoft (see https://www.microsoft.com/en-US/download/details.aspx?id=40784 ). The installation files for the SAP NetWeaver RFC SDK are available on the SAP Service Marketplace: https://accounts.sap.com/ (you need a valid SAP account to access them). Unpack the SAP NetWeaver RFC SDK archive to a directory of your choice.

8.1 Add System Environment Variable
In order for the SAP NetWeaver SDK to be found, the path to the lib directory must be added to the system environment variable "Path". You enter the system environment variable under Control Panel > System.
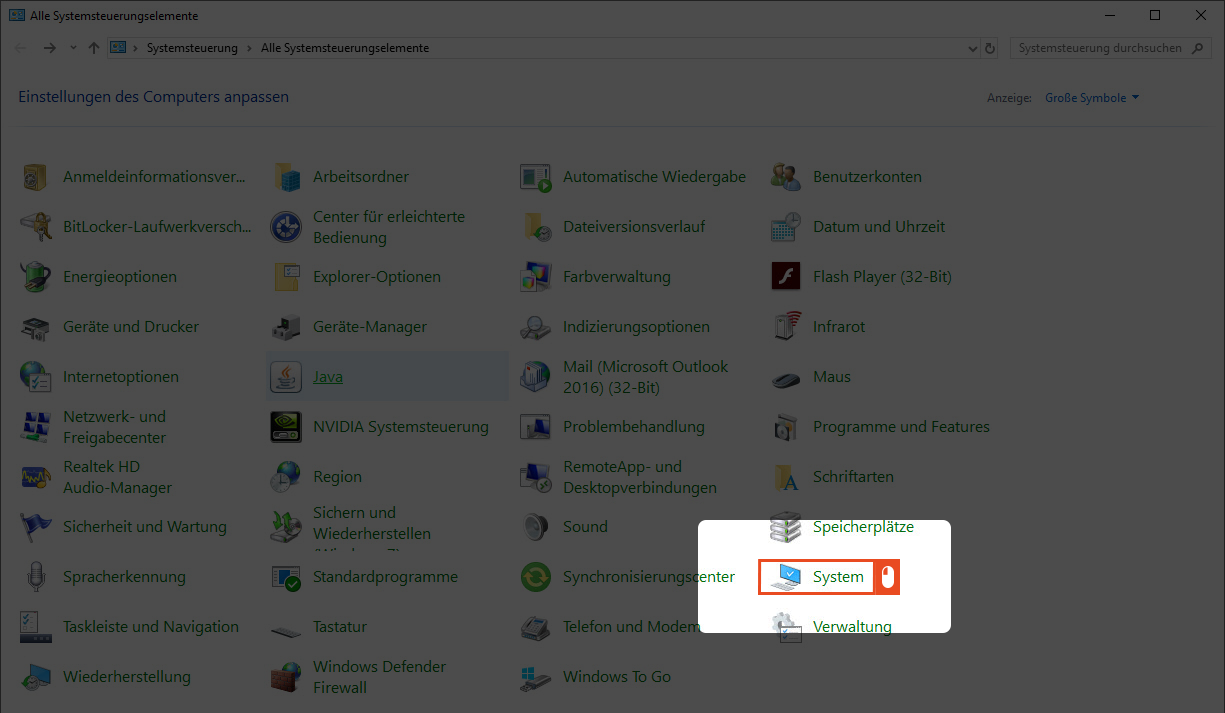
Now click on Advanced System Settings.

A new window will open. Click on Environment Variable.
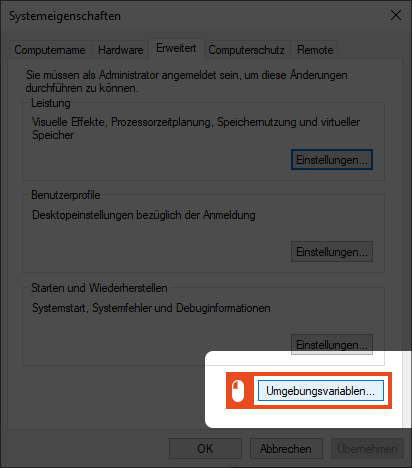
In the new window, click the New button.
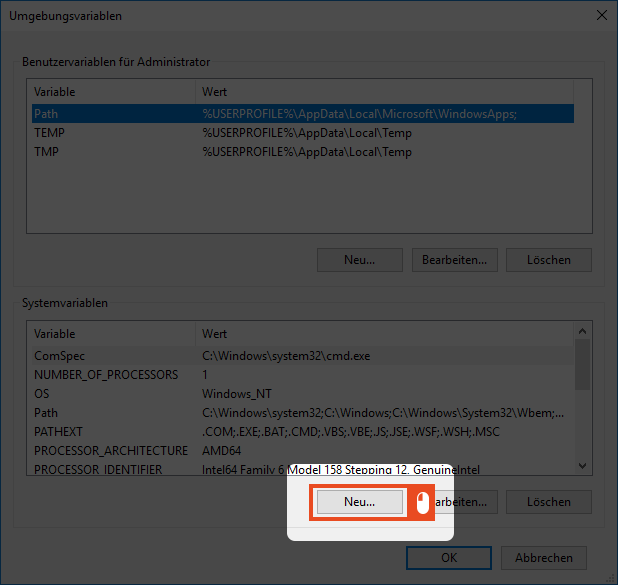
Now add the lib subdirectory of the SDK to the system environment variable and click OK.

You will find the entry you just created in the overview.
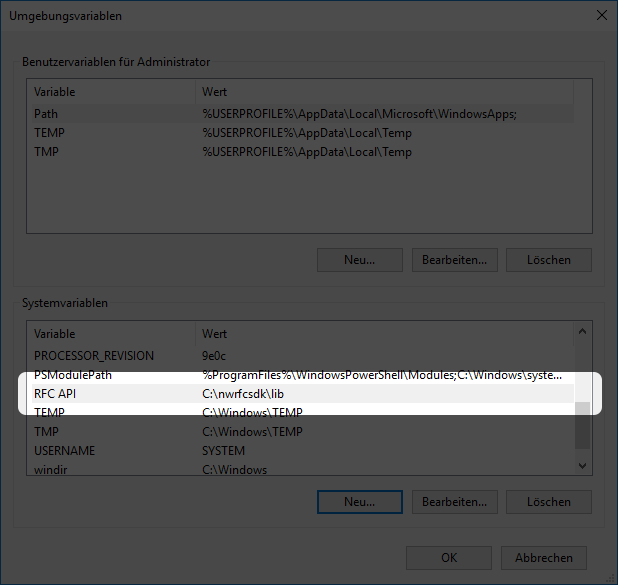
8.2 Optional: Add System Environment Variable via CMD
You can also add the system environment variable via the Windows command prompt. To do this, start the Windows command prompt as administrator and specify the exact path to the SDK.
CODE
|
When using spaces, you must enclose the path to the directory in quotation marks.
CODE
|
9. (Alternative) Microsoft Connector für SAP BW
This library is no longer supported by SAP as of 01.03.2019. You can read more information about this here. If you want to use Microsoft Connector for SAP BW, you do not need to install the SAP front-end software (SAP GUI) on the web server. However, you must copy the SAP .NET Connector file librfc32.dll in the Windows folder to the system subfolder. (Usually, the location of this folder is C:\Windows\system32.). Microsoft Connector for SAP BW provides full support for the 64-bit version of Microsoft Windows. On a 64-bit computer, the following additional requirements apply to Microsoft Connector for SAP BW:
If you want to run packages in 64-bit mode on a 64-bit Windows operating system, copy the 64-bit version of the SAP GUI file "librfc32.dll" to the system32 subfolder of the Windows folder. (Usually, the location of this file is C:\Windows\system32).
If you want to run packages in 32-bit mode on a 64-bit Windows operating system, copy the SAP GUI file "librfc32.dll" to the SysWow64 subfolder of the Windows folder. (Usually, the location of this folder is C:\Windows\SysWow64).
You can download the files here:
librfc32.dll - 32bit → Ordner SysWOW64 (SAP GUI < 7.5) | http://downloads.bluetelligence.de/librfc32/librfc32dll_32bit.zip |
librfc32.dll - 64bit → Ordner System32 (SAP GUI < 7.5) | http://downloads.bluetelligence.de/librfc32/librfc32dll_64bit.zip |
